All products
Guide
This text is machine translated.
Nativity scenes – pre-Christmas modeling fun for the whole family
Nothing conveys the deep meaning of Christmas and the birth of Christ as much as the nativity. According to the tradition of biblical Christmas history, Jesus Christ came to the world in a stable in Bethlehem because Mary and Joseph were not included in any hostel.
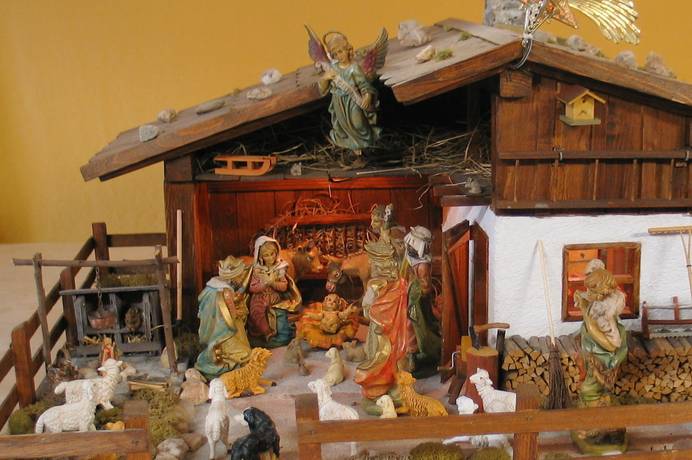
It is precisely this scene that is illustrated with nativity figures in a Christmas crib. The child of Jesus, surrounded by Mary and Joseph, is shown in a feeding crib. According to tradition, stallanimals, usually an ox and a donkey, can often be seen in the Christmas cribs.
The "three ways from the Morgenland" that give the newborn with gold, myrrh and incense are also an integral part of the nativity scene. The shepherds, who were reported by an angel of birth, are also classical figures of a Christmas crib, along with their sheep.
Unfortunately, not everyone has the opportunity to build a Christmas crib himself from a wide variety of materials. That's why a variety of different Christmas cribs are available on the market. In some cases, they can still not deny series production. The individual note is missing. But there is a remedy, as you can also create an individual unique from your purchased Christmas crib.
-
What materials are required for the construction of nativity scenes?
-
How can a Christmas crib be individually designed?
-
How should the Christmas crib environment be designed?
-
What needs to be considered when lighting a nativity scene?
-
Why a nativity scene is never finished.
What materials are required for the construction of nativity scenes?
Since there are no concrete traditions, as the stable at Bethlehem looked like at that time, the door and gate are open today in the design of the nativity scenes. For this reason there are cave ribs, ruining ribs or even mannines that are adapted to the local landscape. Everyone can design their Christmas crib as they like it. There are also no restrictions on the construction materials and everything is possible.
But in most cases wood and stone are preferred. Many commercially made mannins are also made of wood, as this material can be processed relatively easily. This material is also ideal for hobbyists. Strips and boards can be easily cut with small saws and the individual parts can be glued with white glue after grinding. A handmade Christmas crib can thus be easily covered with wooden roof shingles.
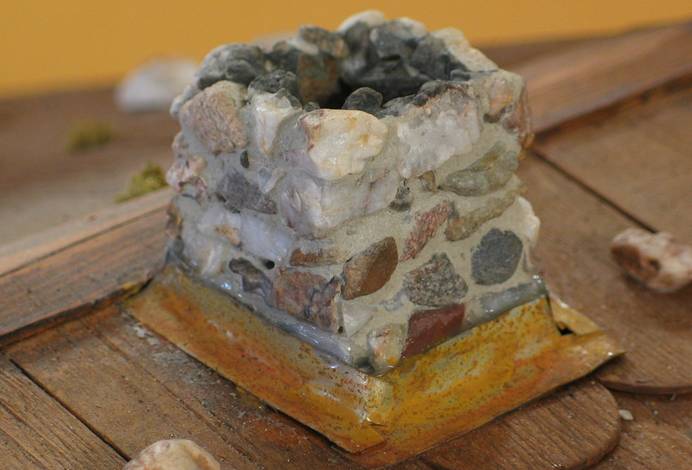
It is particularly charming when working with different materials. Small stones can be glued together e.g. to a fountain ring or a fireplace. The construction is then plastered with tile adhesive and the protruding stones are then washed clean again. With a little practice, an object like a stone is created.
Our practical helpers for nativity scene construction
Our practical tip: Wood selection
If you are looking for wood that is particularly easy to process, you can work with balsa wood. The wood, which is partly used for flight models, is extremely soft, easy to grind and has sufficient strength for nativity scenes. In addition, it can be easily colored with water-soluble colors. Thus, attachments such as benches, chairs, tables or other equipment in different sizes can also be created at ready-bought cribs.
How can a Christmas crib be individually designed?
Individual decoration
If you want to design a Christmas crib individually, you don't necessarily have to build it completely yourself. This would be a real challenge, for example, if neither a hobby workshop nor a hobby corner and the necessary tools are available.
In this case, you can also switch to a bought Christmas crib with lighting. Depending on the design, these models also offer sufficient potential for individual expansion and loving design.
After all, the nativity scene should perfectly match with Mary, Joseph, the child and all the other nativity scenes.
With self-made attachment parts and lovingly designed accessories, you can also give commercially created cribs an individual touch. But before it is ready, the first step should be to focus on the color design.
Make it realistic with color
In the case of a purchased manger, the wood is in most cases natural and untreated. As with the self-made copies shortly after completion. Thus the constructions always look new and far from reality. Good, some manufacturers still make the effort to partially flame the wood to create a rustic impression. However, the structure still does not seem natural. Only when color comes into play can you make a Christmas crib as natural as if it had a real role model.
Our practical tip: Color design
Do not apply the color evenly over a large area. No, the color shades must run into each other. On the sunny side, the wood is Heller and on the darker side of the shade.
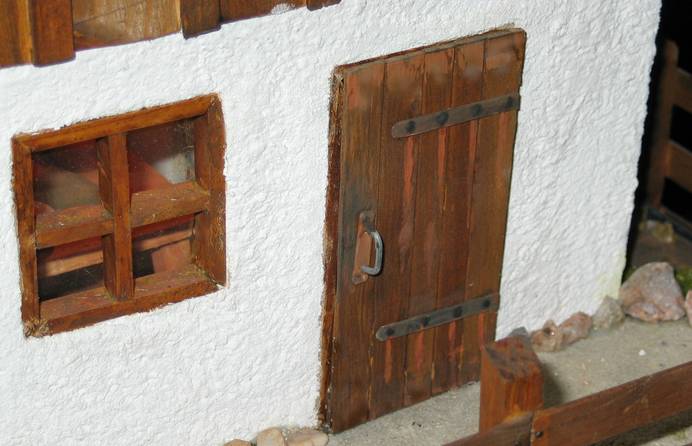
A wooden door, for example, is never uniformly brown, but has clearly visible weathering traces. Most of the time, it is brighter at the top and darker at the bottom of the floor. Dark signs of use can be seen at the door handle and at the front edge, and visible marks of dirt run down from the nails of the heavy door fittings, which the rusty water left in the rain.
Important: Always work from the light colors to the dark colors. Commercially available Aqua Color colors are suitable as colors, which can be diluted with water. But the classic school paint box or tinting colors from the arts and crafts area are also well suited. Alternatively, the airbrush technique is also suitable for realistic color schemes.
Everything you need to make your crib colorful
How should the Christmas crib environment be designed?
When the colored design of the nativity scene is finished, the environment must of course also be adapted. It would be a complete break in style if the realistic-looking building were to stand on a natural wooden slab. Therefore, the base plate must also be prepared accordingly.
It is good that you can use the extensive range of model railway terrain for this task. Here you will find everything from grass mats, flowers, bushes, trees and hedges to rocks and water design, which was needed for the reproduction of nature.
In combination with natural materials such as pebbles and small branches, this can create an amazingly real looking environment. Targeted grass tufts in corners and niches are particularly realistic. But please also think about the roof of the crib. Moose and lichen are also on the spot over time.
By the way, besides the scene from the Holy Night, traditional and regional motives are also gladly incorporated into the surroundings of the crib. There are no limits to the imagination. Only the space limits creativity here.
Perfectly suited for the crib area
Our practical tip: Scatter material
If the base plate is coated with glue in the respective area before applying the scatter material such as sand or model railway grass, the materials remain permanently in place. Excess material that is not glued to the base plate of the Christmas crib can be vacuumed with the vacuum cleaner. If a woman's stump is pulled over the vacuum cleaner tube, the creche builders can catch and reuse the vacuumed materials as needed. If the scatter grass is also applied with a special scatter grass can, the individual arms of the scatter grass will charge up statically when shaking. They do not lie flat in the glue but then stick completely true to the prototype only with the tips in the adhesive.
What was to be observed when lighting a Christmas crib?
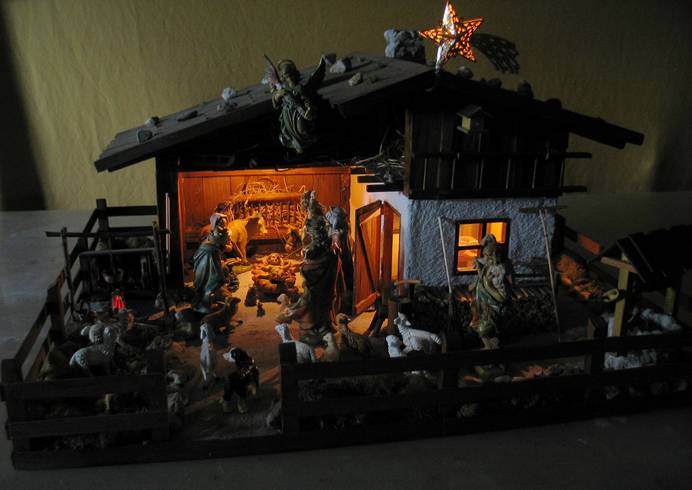
In order for the individual crib to become an eye-catcher for every viewer, a lighting with the right light must be installed in every case. However, you can do a lot wrong with the nativity scene lighting. Most of the nativity scenes show the child of Jesus in the crib under an open roof. This is a good thing, because this gives the viewer a clear view of the scene. And the must be illuminated accordingly. However, not with a miniature halogen spotlight with 500 Watt. Rather, the nativity scene lighting should be more discreet and have a warm-white color tone. The worst error is when the bulbs of the nativity scene are visible. If so, then you should use suitable lamps or lanterns in which the illuminants are invisibly integrated. Otherwise, it is also possible to install the illuminants in a concealed way.
In the meantime, warm white LEDs and LED lamps are ideal for nativity lighting. In contrast to light bulbs, LEDs are almost invisible to install and do not develop heat. This is an invaluable advantage, because often easily flammable materials are in the immediate vicinity of the light sources.
In addition, the power-saving LEDs can also be operated without any problem with batteries. This means that no power connection is required at the installation location of the crib.
If the nativity scene lighting is to be supplied from the mains, a transformer or a plug-in power supply is required. The transformer or the mains adapter converts the 230 V mains voltage into a voltage suitable for the illuminant. The transformer can then be mounted invisibly behind the Christmas crib.
Alternatively, there are also special transformers for nativity scenes, which provide special connector strips for connecting the illuminants.
Our practical tip: Nativity scene lighting
The first glance of the viewer naturally focuses on the essentials. So Jesus Christ in the feeding crib and the figures grouped around it. This is why this area must be the focus of the lighting.
Of course, other areas should also be illuminated. However, the lighting needs to be rather discreet so that the viewer is not distracted from the main scene at the first moment. Worthwhile objects are, for example, the campfire or even the Christmas star over the stable.
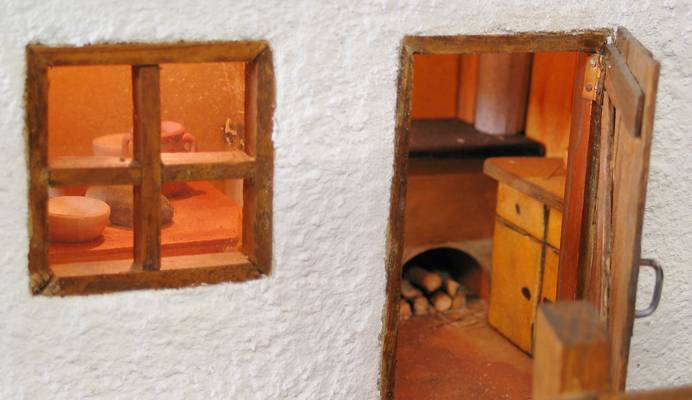
If the crib has a side room with window or door, this room should also be illuminated inside. However, it makes sense to add an interior to this room.
Our lighting suggestions:
Why a Christmas crib is never finished!
The construction or expansion of a crib is a rewarding fun for the whole family. Especially if children are allowed to help under guidance and can contribute their own ideas in the decoration, the thing is really fun. So it is no wonder that a Christmas crib is never finished and lives from constant expansion.
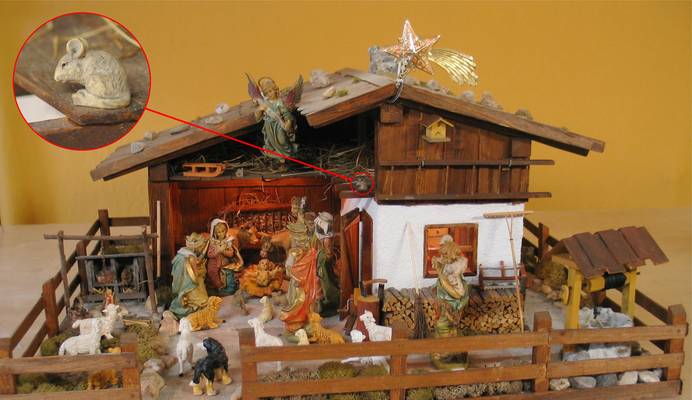
Even when the large "construction sites" are completed, there are still plenty of opportunities to improve the various details. Then the crib is not only a decoration object, which is detected immediately at a glance. No, the viewers linger for a while and enjoy small things.
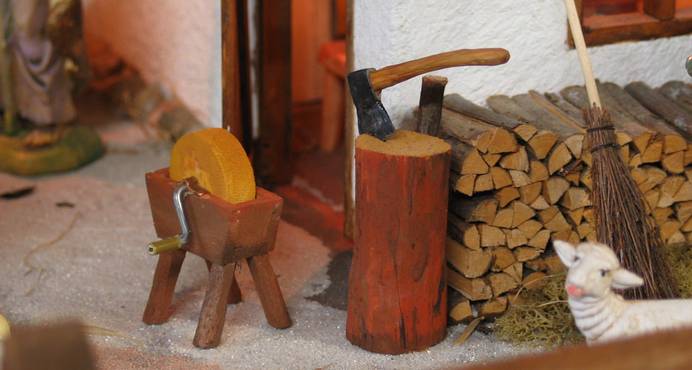
The wooden lantern hanging in the corner, the hand-carved wooden shingles or the fallen wood butt are only captured at the second or third glance. Enjoy pre-Christmas modeling fun and build your own individual Christmas crib.
