Calibration » Definition, instructions & meaning
This text is machine translated.
Updated: 19.05.2022 | Reading time: 8 minutes
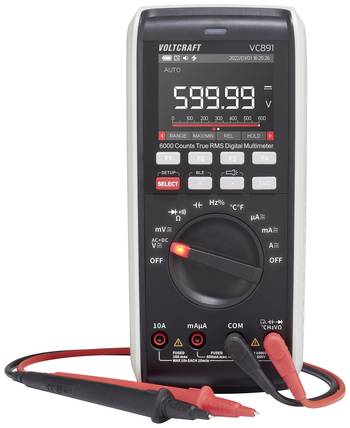
Very often you can find the performance feature "calibrated" in the offers of digital multimeters, oscilloscopes or power supply units. The calibrated versions usually have a slightly higher price level than the same models without calibration.
It could therefore be assumed that the calibrated measuring devices may measure better and more accurately than the uncalibrated versions. However, this is not the case.
We would like to explain in more detail below what exactly calibration is and why calibrated devices are absolutely necessary in some areas of application.
To do this, however, we must first deal with the subject of measurement tolerance. We will explain what this is and how the measurement tolerance is determined using a multifunction measuring device.
Every measuring device is subject to certain tolerances that cannot be avoided due to the design, component tolerance and ambient conditions. These measurement inaccuracies are independent of the physical quantity measured and lead to more or less deviating measurement results.
How large the deviations may be in each measuring range is specified by the manufacturer in the technical data in the form of a tolerance of ±0.9%, for example. With a voltage of 10.00 V, a deviation of ±0.9% would amount to a maximum of ±0.09 V. The measurement result should therefore be in the range of 9.91 and 10.09 V.
Display errors in counts are added to the basic accuracy. These are also specified by the manufacturer. The display errors depend on the measuring range and the maximum count number of the measuring device.
Here is an example:
A measuring device with 2000 counts can display the range from 0 - 1999. The decimal point is variable. This means that voltages up to 1.999 V can be displayed with three decimal places. Voltages up to 19.99 V are displayed with 2 decimal places. In the range up to 199.9 V, one decimal place is displayed and for voltages above 200 V, no decimal places are visible on the display. The decimal places also define the resolution, i.e. the smallest voltage change that can be displayed.
In the measuring range up to 20 V, for example, the resolution is 10 mV per count (20 V : 2000 counts = 0.01 V/count).
If an accuracy of ± (0.9% + 4 counts) is specified for a measuring device with 2000 counts in the range up to 20 V, the measurement result for a voltage measurement of 10.00 V may deviate by a maximum of ± 0.13 V (0.09 V + 4 x 0.01 V). The displayed measured value will therefore be between 9.87 V and 10.13 V.
During calibration, a precisely defined input variable, known as the standard, is compared with the measurement result of the measuring system to be tested. The standard must be at least 5 times more accurate than the measuring device to be tested.
With reference to the measurement example above, a calibrator outputs a measurement voltage of e.g. 10.00000 V and it is checked whether the measuring device displays a result within the accuracy limits.
Further measurements are then carried out in the same voltage range or with a different measured variable.
The deviations in the measurement results are recorded in a calibration report. This protocol is later enclosed with the measuring device.
Important:
During calibration, only the deviations in the measurement results are recorded exactly. No intervention in the measuring device, e.g. to minimize the deviations, takes place during calibration.
Hobbyists who build electronic circuits and control systems in their spare time will need good, but certainly not calibrated measuring devices.
Similarly, the multimeter in the toolbox of a car mechanic or heating engineer does not necessarily need to be calibrated.
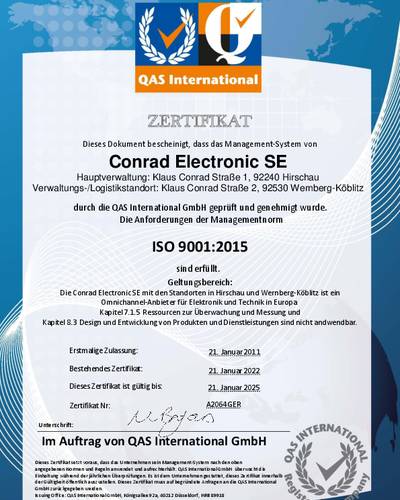
The situation is different when companies, institutions, authorities and industrial companies are certified according to ISO 9001 or similar.
Due to applicable regulations and as part of the desired quality assurance, these facilities must fully document the recorded measurement results as well as the traceable calibration of the measuring equipment.
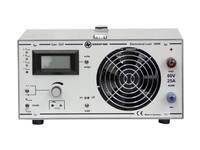
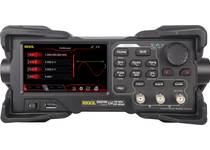
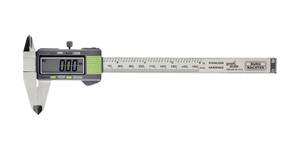
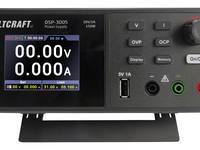
Whether power supply units or measuring devices, at Conrad Electronic you will find a wide variety of calibrated devices. We have compiled a small selection of the most important product groups for you below. Unfortunately, we cannot list all calibrated devices in our product range here.
If you would like to know whether we also offer a calibrated version of the device you require, simply use the filters above the product group.
Laboratory power supplies
Whether a measuring laboratory is able to carry out the calibration process with the appropriate test equipment is regularly checked by an accreditation body and certified.
Conrad Electronic also has a certified calibration laboratory and is therefore able to calibrate measuring devices in-house. Primarily "VOLTCRAFT" digital multimeters and current clamps are calibrated in the areas of current, voltage and resistance.
Measuring instruments that cannot be calibrated in-house are forwarded to our cooperation partner Testo.
Before a measuring device can be calibrated, it must have sufficient time to acclimatize. Calibration is carried out at a temperature of 22 °C (± 1.5 °C) and relative humidity of 50 % (±10 %). The devices to be calibrated are therefore stored in the calibration room for at least 12 hours.
Calibration is carried out with the aid of a calibrator. This calibrator is able to generate very precise voltages, currents or resistance values. The calibrator is automatically controlled by a computer program for easy execution and to avoid setting errors.
After entering the type of measuring device, the calibration program knows which measuring ranges must be tested and how large the maximum permissible measurement deviation may be.
Additional data such as company name, customer number, serial number or inventory numbers are also recorded for the calibration report. The computer program then specifies the measuring range to which the measuring device must be switched. Once the setting has been made and confirmed with a mouse click, the calibrator outputs the first measured value.
The value read in the display of the measuring device is now entered into the computer.
The calibration program then calculates the actual deviation of the displayed measured value and decides whether the read value is still within the tolerance values or not.
The calibrator then outputs the next measured value.
This value must also be read and entered by the employee responsible for calibration.
In some cases, several measured values (e.g. at approx. 10% and 90% of the measuring range) are checked for each measuring range.
All required measurements are now carried out step by step and the measured values are recorded. If all measurement results are within the tolerance range, the measuring device is sealed with a sticker and sent back to the customer together with the calibration report.
New measuring devices intended for sale are returned to stock after calibration. Current stock levels and continuous sales figures are constantly monitored to ensure that our customers always receive the latest calibrated measuring devices.
Procedure in the event of a fault
If one or more measured values are outside the measurement tolerance, the calibration is still carried out to the end. The calibration performed is later used to verify the error.
The measuring device is then readjusted. During this readjustment, which is carried out either via the trim potentiometer in the device or via the device software, the display value is changed so that it is once again within the permissible tolerance range.
A second calibration is then carried out to record the success of the readjustment.
Measuring devices that cannot be readjusted and are outside the tolerance values should no longer be used in ISO 9001-certified companies.
The calibration of a measuring device is always just a snapshot. This means that at the time of calibration, the measuring device has met its specifications and displays the correct value. However, technical components are subject to ageing and wear. It can therefore be assumed that the measurement deviations will also increase with age and frequent use.
Therefore, regular calibrations should be carried out. We recommend renewing the calibration after 12 months. However, if the device has been tampered with for repair purposes, it must be calibrated immediately.
Calibrated calibration devices
Of course, it is not only our customers' test equipment that needs to be calibrated regularly. The calibrators we use are also checked and calibrated at regular intervals. The measuring equipment with which our calibrators are tested must be many times more accurate than the already very precise calibrators. Only in this way can the quality of the calibration chain be maintained and seamlessly documented in a traceable manner.
What is the difference between a DakkS certificate and an ISO certificate?
To ensure quality and reliability in industrial measurement, accredited calibration laboratories work under the supervision of the German Accreditation Body (DakkS). DakkS accreditation means that the certificates issued are internationally valid and guarantee maximum precision thanks to metrological traceability.
Calibration in accordance with ISO (International Organization for Standardization) is a more cost-effective alternative to DakkS certificates. Nevertheless, ISO calibration takes into account all relevant and industry-specific laws, standards and guidelines.
At the same time, many manufacturers carry out an adjustment according to the factory standard when producing measuring devices. This is to ensure the quality of the products and compliance with the tolerance limits. Written proof or a certificate is not issued for factory calibration.
What does metrology mean?
Metrology is the study of units of measurement and measurement. The highest national authority for questions relating to metrology is the Physikalisch-Technische Bundesanstalt in Braunschweig.
What is the difference between calibrating and to oak?
During calibration, an exact input value is compared with the output value of a measuring device and the deviations are documented. The input values can describe both physical and electrical variables. The output values can be electrical signals or just readings. Calibrations are carried out by certified facilities.
Calibration is a quality test and marking in accordance with the calibration regulations and is therefore subject to legal regulations. It is mandatory for measuring instruments that are used for pricing. This includes, for example, scales in butchers' shops or fuel gauges in petrol pumps and tankers. Calibration is carried out by employees of the calibration office.
What is the difference between calibrating and adjusting?
During calibration, only the deviations from the target value to the actual value are determined and recorded. There is no intervention in the device to be tested.
During adjustment, the display values are changed so that a correct result is displayed. Depending on the type and design of the measuring device to be adjusted, the adjustment can be carried out mechanically or electronically.
How often do multimeters need to be calibrated?
There are no legal regulations in this regard. The device manufacturers recommend when the device should be recalibrated. This period is usually 1 year. However, measuring devices can also be calibrated at shorter intervals on request.
Does the calibration protocol always have to accompany the measuring device?
The calibration certificate must be readily available in the event of a test. It therefore makes sense to enclose the certificate with the measuring device. If the measuring devices are used under adverse conditions and there is a risk of the calibration documents being damaged as a result, central storage in the office is the better solution. In any case, the documents must be immediately available in the event of an audit.
