Instructions » Soldering explained simply
This text is machine translated.
Updated: 12.04.2022 | Reading time: 21 minutes
There is a clear video in our Conrad Academy in which Sven shows how to solder and desolder correctly. It's not just about how to solder PCBs, solder breadboards or solder printed circuit boards.
Handling a soldering device is a daily routine for electronics specialists at work. Even skilled craftsmen have no problems with soldering. However, if you only use a soldering iron from time to time, the result is often unsatisfactory.
Soldering correctly according to instructions would be quite simple. Even if you have no experience, you can easily learn how to solder.
We will show you how to do it and have compiled lots of interesting information on the subject of soldering.
Humans have been working with metals for thousands of years. And the desire to be able to join these metals together permanently is just as old. Metals such as copper, silver and gold were joined together to make jewelry or cult objects as early as 5000 BC. At that time, an alloy of copper and gold or copper and silver was used as a solder.
With the discovery of tin as a soldering metal, soldering technology increasingly flourished. Water pipes were soldered together from lead pipes as early as 4000 years ago in ancient Rome.
In handicrafts, ovens and bathtubs were made from bronze sheets, which were then soldered together. This technique was also used in weaponry and goldsmiths to join metals.
Over time, the soldering technique became more widespread and refined. In addition to its use in the trades, soldering became increasingly important in electrical engineering.
Every service technician involved in the maintenance and repair of electrical appliances has a soldering iron in their toolbox. And without automated soldering processes, the mass production of electronic circuit boards would be inconceivable today.
Soldering and welding are material-locking connections that differ from each other in three ways:
1. Working Temperature
In brazing, the solder liquefies at a temperature of less than 1000 °C. In gas fusion welding, on the other hand, the oxygen/acetylene flame has a temperature of almost 3000 °C.
2. Type of connection
During welding, the materials to be joined are liquefied in the seam area. The welding rod supplied is used to fill gaps and can influence the properties of the molten material. During soldering, the materials are only heated to the point where they form a superficial bond with the solder. The workpieces do not fuse as they do during welding.
3. Strength of the connection
Basically, it can be said that The higher the temperature during joining, the greater the durability and strength of the joint. Consequently, a welded joint is stronger than a soldered joint. And a brazed joint is stronger than a soldered joint.
Summary
A welded joint is much more stable than a soldered joint. However, welding is much more complex and extensive protective equipment is required.
In addition, not all materials or connection points can withstand the high temperatures during welding. In this case, soldering is required. Due to the low material thickness, gutters are soldered instead of welded. And soldering copper pipes is one of the basic skills of an installation specialist.
Both types of connection are soldering processes. Nevertheless, there are significant differences in the areas of application and procedures:
Soft soldering
In soft soldering, the heating takes place selectively.
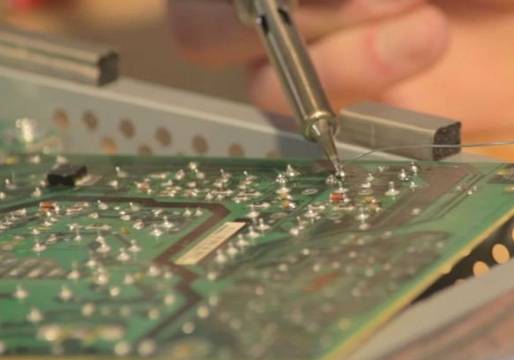
Soft soldering is primarily used in electrical engineering, e.g. to connect components to a circuit board in an electrically conductive manner. As a result, soft soldering technology is also primarily used for service work in this area and offers many advantages:
- The working temperature range is between 180 - 250 °C, which means that the components to be joined are not thermally overloaded.
- The soldered joint offers sufficient mechanical strength to ensure that even larger components are held securely.
- The soldering iron only heats the material selectively, which means that the soldering process can be carried out quickly.
- No special protective measures are required apart from solder fume extraction.
Brazing / Hard soldering
Large-area heating takes place during brazing.
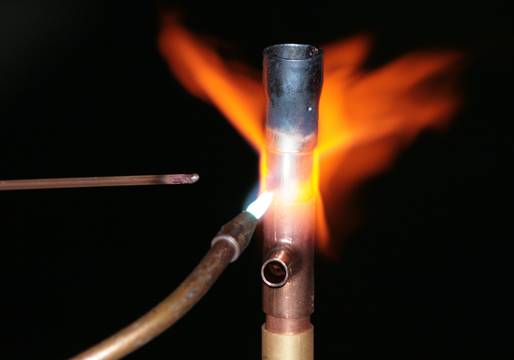
With brazing, the temperatures are significantly higher and the work is not spot brazed. If a soldered joint is made above 450 °C, it is referred to as brazing. There are also a few things to bear in mind here:
- Some brazing alloys have a melting point of almost 1000 °C. These temperatures cannot be reached with soldering irons. This is why suitable soldering torches are used.
- The temperature effect is not punctual, but rather over a large area. This allows the solder to flow well.
- As with welding, the relevant fire safety regulations must be observed when brazing.
- Due to the high temperatures, fireproof clothing, an apron and darkened safety goggles are required.
In principle, many metals and alloys can be soldered together. The following materials can be easily soldered together using universal solders and fluxes:
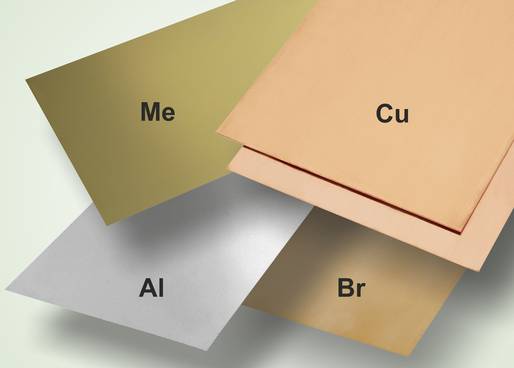
- Copper (Cu) and copper alloys such as brass (Me) or bronze (Br)
- Nickel and nickel alloys
- Ferrous materials
- steels
- Precious metals
Special solders or fluxes are required for other metals such as aluminum (Al), tin, zinc, lead or stainless steel.
In the chapter "Soldering aluminum - how to do it right!" we take a closer look at the topic and show you what to look out for when soldering aluminum. In principle, stainless steel soft soldering works in the same way.
When people talk about "soldering", in most cases they are referring to soft soldering. In contrast to hard soldering, which is mostly practiced by skilled personnel, the necessary utensils for soft soldering can be found in almost every household.
1. Soldering device
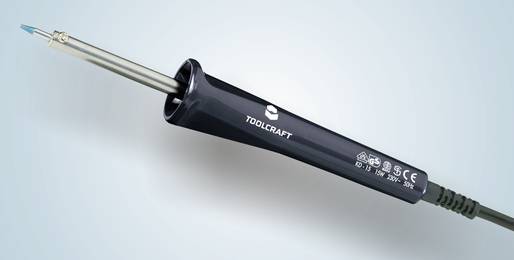
Soldering iron
A soldering iron is needed to generate the heat required for soldering.
In most cases, people who do not have in-depth specialist knowledge but still enjoy tinkering will use a hand-held soldering iron without temperature control.
These soldering irons offer a very good price/performance ratio, which means that the hobby budget is not overburdened. They are also available in a wide range of performance classes and sizes, so that the various soldering tasks can be performed optimally.
Soldering gun
Service technicians like to carry soldering guns in their toolboxes. This is because it is often not certain in advance whether soldering is really necessary to repair a device.
If the cause of the fault is identified as a bad solder joint, a broken conductor or a loose wire connection, the soldering tool needs to be ready for use quickly. And this is exactly when the soldering gun comes into its own.
Thanks to powerful heating elements, soldering guns reach the soldering temperature in just a few seconds.
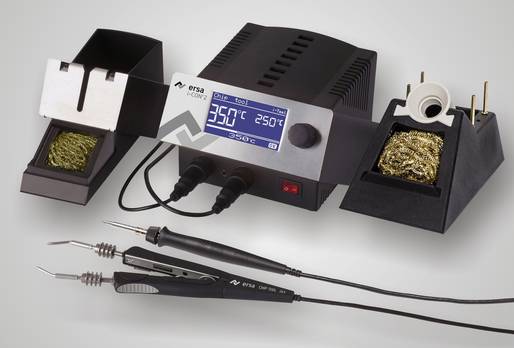
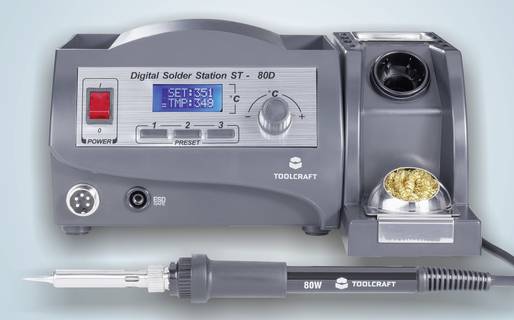
Soldering station
Ambitious people who already have basic knowledge will appreciate the advantages of a temperature-controlled soldering station, as will skilled personnel. This is because the optimum temperature for the solder is precisely maintained.
And in the event of massive heat dissipation through large soldering surfaces, the required soldering temperature is quickly reached again. This means that the soldering process can be carried out in a short time without placing too much thermal stress on the sensitive components.
Another advantage of soldering stations is that different soldering tips with different shapes are available for the associated soldering irons.
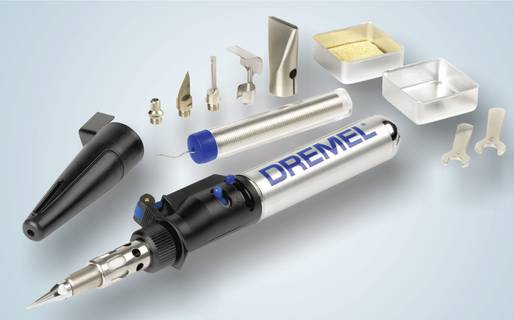
Gas soldering iron
Many people appreciate the benefits of a gas soldering iron at the latest when soldering is required and no power connection is available.
For example, a loose battery connector can be soldered back on just as quickly and easily at the model airfield as a torn speaker cable in the trunk.
But gas soldering irons offer an even wider range of applications. They are also suitable for melting, hot cutting, plastic welding, shrinking or fire painting (pyrography).
2. Soldering tin
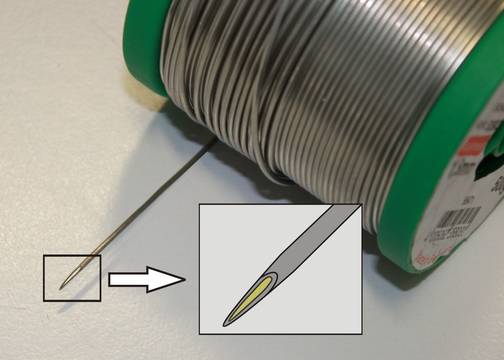
Soldering wire is a mixture (alloy) of different metals. As tin (Sn) is the main component of the solder, the name solder has become commonplace. Other materials that are added to solder in varying quantities include lead (Pb), copper (Cu), silver (Ag), gold (Au) and bismuth (Bi). The properties of the solder change depending on the addition and mixing ratio. It can therefore be optimally adapted to the different requirements of soldering.
The main task of the solder is to fill the space between the workpieces to be soldered.
It must also create both a mechanical and an electrically conductive connection.
For this reason, the solder generally has a lower melting point than the metals it is used to join.
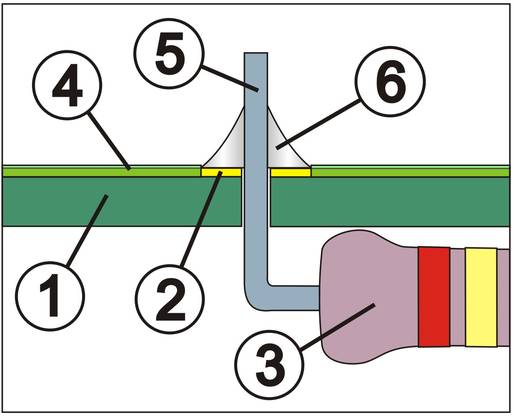
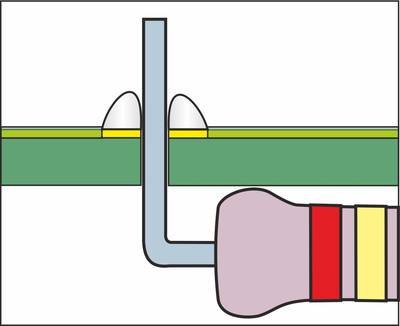
- Circuit board
- Soldering eye
- Component (resistor)
- Conductor track with protective lacquer
- Component connecting wire
- Solder
Soldering tin is divided into two categories:
Lead-containing solder
For decades, solder containing lead was the perfect solder for soft soldering. The solder with the designation Sn60Pb40 consisted of 60% tin and 40% lead and was widely used. At a temperature of 183 °C, it changes from a solid to a "porridge-like" state until it becomes liquid at 191 °C. The solder has very good flow properties and produces shiny metallic solder joints. However, cold solder joints also form very quickly if the components are shaken or moved during the cooling phase.
Alternatively, the solder SN63Pb37 is eutectic. This means that this solder suddenly changes from a solid to a liquid state at 183 °C. If the temperature falls below this point, it changes back from a liquid to a solid state just as quickly.
According to EU Directive 2011/65/EU (RoHS = Restriction of Hazardous Substances), the use of certain hazardous substances is restricted. This includes the toxic heavy metal lead. For this reason, lead has not been used in solder in the production of electrical and electronic devices for several years.
Lead-free solder
The biggest difference to solder containing lead is the higher melting temperature, which is 218 - 230 °C. Lead-free solders consist mainly of tin (Sn), to which silver (Ag), gold (Au) or copper (Cu) are added.
Unfortunately, the flow behavior and surface quality of lead-free solder is significantly worse than that of solder containing lead. The best results are achieved when the solder contains 3% silver and 0.5% copper (Sn3.0Ag0.5Cu) in addition to the tin.
Even if this solder is more expensive than the classic lead-free solder with 1% copper (Sn99Cu1), private individuals should opt for the variant with silver content. Due to the lower consumption, the disadvantage is not quite as serious.
3. Flux
A flux is required so that the workpieces are optimally wetted by the solder during soldering. A chemical reaction removes the existing oxides on the workpiece surfaces and prevents the formation of new oxides during the soldering process.
In addition, the surface tension of the liquid solder is reduced so that the solder can adhere cleanly to the workpieces. In practice, the flux is fed to the soldering point together with the solder. For this purpose, the solder is built up in a tube shape and the flux is embedded inside (see enlarged section).
When using bar solder, the flux must first be applied manually to the sheet metal parts in the area of the solder joint. There are various products available for this purpose, which are sold under the names soldering water, soldering grease or soldering honey.
According to DIN 8511, the type designation F-SW-23 defines the materials for which the flux is suitable and how corrosive the residues are.
F = Designation for flux (flux)
S = Solderable material (S stands for heavy metal, L stands for light metal).
H = Soldering process (H stands for hard soldering, W stands for soft soldering).
11 - 13 (highly corrosive - flux residues must be removed).
21 - 28 (slightly corrosive - flux residues must be removed).
31 - 34 (non-corrosive - flux residues do not need to be removed).
4. Soldering aids
When soldering, you may often need more than just two hands. This is because the soldering iron is held with one hand and the solder is fed in with the other.
However, a circuit board, components or wires must also be held in the correct position so that the soldering process is easy. This is done by the "third hand" in the form of a small stand with crocodile clips.
If a magnifying glass is then also used to magnify the "operating field", even delicate soldering tasks can be completed quickly.
But there are many other practical tools and helpers such as circuit board sets, soldering tip cleaners and solder wire dispensers that make soldering even easier.
5. Solder fume extraction
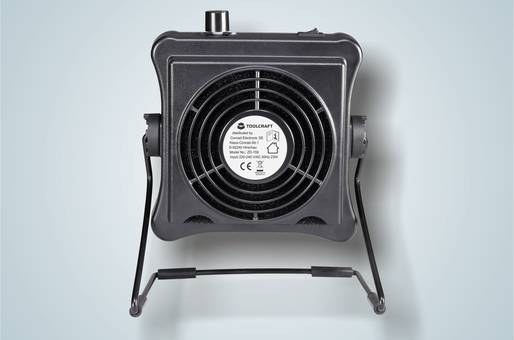
The health hazards caused by the soldering fumes should be kept to a minimum. For this reason, people who rarely solder should also use a suitable solder fume extraction system.
Even if they only work with lead-free solder. This is because flux vapors can also have an adverse effect on health and well-being.
The aerosols containing colophonium produced during soldering are extracted directly at the workplace and bound in an activated carbon filter. This effectively prevents direct contact with the skin, eyes and respiratory tract.
Unfortunately, this question cannot be answered with a specific wattage. This is because the required power of a soldering iron depends on what is being soldered. More precisely, the heat dissipation of the soldered joint is the decisive criterion. If two thin wires are soldered together, the heat dissipation through the thin wire strands will only be minimal. In this case, rapid reheating of the soldering tip is not necessary.
The situation is different with shielding plates or earth solder joints. If a material with good thermal conductivity massively reduces the temperature of the soldering tip, it must be reheated quickly so that the required soldering temperature is reached in a short time. This, in turn, is only possible with a powerful soldering iron. However, powerful soldering irons also require a wider, chisel-shaped soldering tip so that the heat can be transferred quickly to the solder joint.
This makes it possible to carry out the soldering process in a short time without thermally overloading the workpieces or components.
Before you start soldering, you should know what happens when soldering is done correctly. This is because the soldering process takes place in three phases. The soldering process is only successful if all three phases are carried out correctly.
Step 1: Wetting
The solder joint is heated with the soldering tip and then solder is added. Care must be taken to ensure that the solder joint is completely covered or wetted by the molten solder.
Step 2: Flow
In this phase, the liquid solder or soft solder must flow into the spaces between the soldered joints to create a large-area connection between the workpieces. During this phase, the soldering tip is removed from the solder joint.
Step 3: Binding
During the bonding process, the solder joint cools down and hardens. The workpiece must not be shaken under any circumstances during this phase. This would lead to "cold solder joints".
Our practical tip: Optimal soldering process
The entire soldering process should take 2 to 5 seconds according to the 3-step instructions and depending on the size of the solder joint. If the solder still does not enter the flow phase after 5 seconds, the soldering process must be aborted and a more powerful soldering iron used.
Proper soldering needs to be learned. But with professional guidance and a little practice, it's no problem:
1. Preparation
- The parts to be soldered must be clean and must not have an oxide layer. If necessary, deposits can be removed with alcohol, a glass eraser or steel wool.
- Use a rubber mat to protect the tabletop from solder splashes. In addition to special flame protection mats, inexpensive rubber floor mats from the automotive sector can also be used.
- Have all the necessary tools and aids such as side cutters or a third hand ready to hand.
- Switch on the soldering device and check the soldering tip. If necessary, clean the tip with an ammonia stone or a soldering tip cleaner made of metal wool. The damp sponges often used in the past are now less advisable. The thermal shock when wiping can lead to fine cracks in the soldering tip.
- Tin the clean soldering tip with a little solder or soft solder.
2. Soldering cables and wires
If you want to solder cables together or connect wires for an electrical connection, it is best to proceed as follows:
- Use wire strippers to remove the cable sheathing.
- Twist the fine wires of the cable with your thumb and forefinger to form a stable conductor.
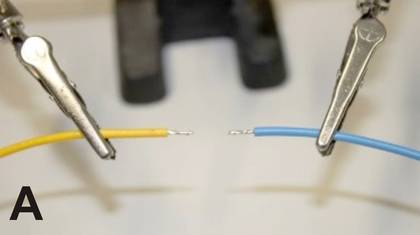
- Heat the end of the wire with a soldering iron and add the solder. The liquid solder is then drawn into the twisted cable end by the capillary action (Figure A).
- Before two tinned cable ends are soldered together, a piece of heat-shrink tubing must be pushed onto one side to insulate the soldered joint later.
- Using the third hand, the cable ends to be connected can be positioned next to each other and held securely.
- Heat the two wire ends with the soldering tip and add a little solder.
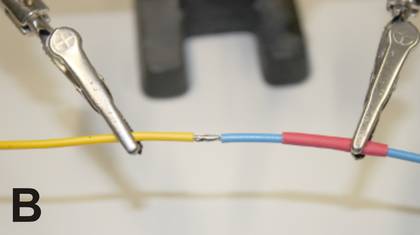
- If the soldering is successful, both wire ends are enclosed by a common solder coating (Figure B).
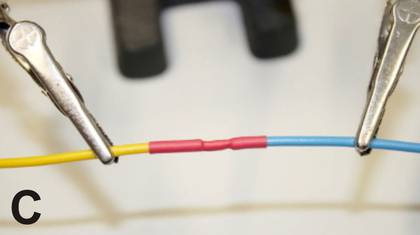
- Finally, the soldered joint is insulated with the heat-shrink tubing (Figure C).
3. Soldering components onto circuit boards
Use a bending device to bend the connecting wires of resistors, coils or capacitors to the correct pitch.
- Insert the connecting wires through the circuit board and angle the wires slightly so that the components are held securely in the correct position.
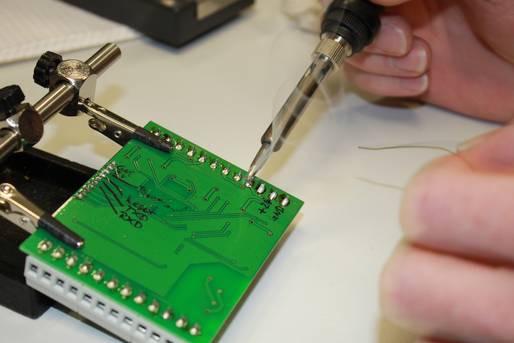
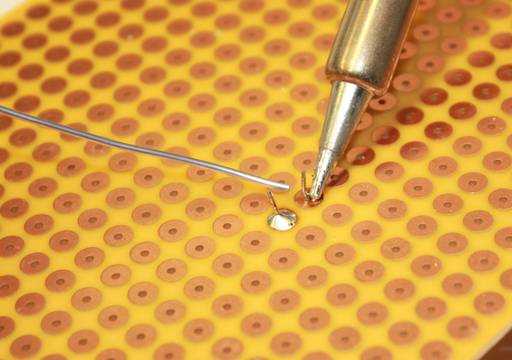
- Heat the soldering eye and the connecting wire with the soldering tip. The soldering tip must have extensive contact with the solder joint. If the soldering tip has been tinned beforehand, this tin serves as a thermal bridge.
- Add some solder to the heated solder joint.
- The liquid solder must completely cover the soldering eye and surround the connecting wire.
- Ensure that the workpiece is not shaken during cooling, otherwise brittle solder joints will occur.
If the soldering process is successful, the solder joint has a shiny metallic surface and the contact surfaces are completely enclosed by the solder. When using lead-free solder, the surfaces of the solder joint can also be dull instead of shiny.
Choosing the wrong soldering iron
Soldering tip retracts too quickly
Incorrect procedure for soldering
People with less specialist knowledge in particular tend to apply the solder to the soldering tip and then try to somehow transfer the liquid solder bubble to the solder joint.
As the solder joint is cold in this case, the solder will not form a bond with the soldering eye or the component. This procedure does not lead to a reasonable result.
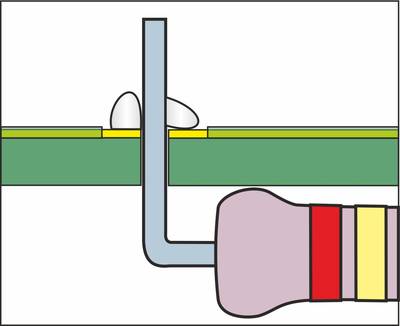
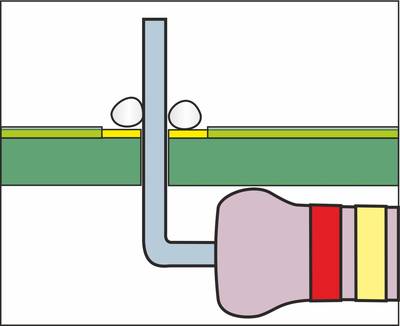
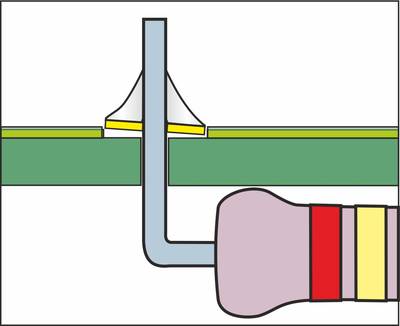
Generous use of solder
Generous use of solder usually leads to undesirable solder bridges. For this reason, care should always be taken to avoid short circuits caused by solder bridges where solder joints are close together.
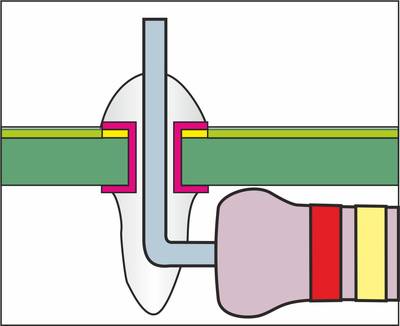
In the case of through-hole solder joints (see sketch), excess solder can drip off the underside of the board and also cause short circuits.
Move the components during the cooling phase
Overheating of the solder joint
If the temperature of the soldering iron is too high or the soldering tip remains on the soldering point for too long, temperature damage can occur.
The insulation on cables can melt and the conductor tracks and solder pads on circuit boards can come loose. In extreme cases, this can result in invisible hairline cracks that lead to conductor breaks.
Components can also be damaged by the excessive heat.
Our practical tip: Be careful when exposed to heat
Experience has shown that it is not necessarily semiconductors such as diodes, transistors, thyristors or triacs that suffer heat death during soldering. Electrolytic capacitors react much more sensitively to prolonged exposure to heat during soldering.
It is not recommended to "iron out" a faulty solder joint by heating it again. It is better to remove the solder and re-solder the joint. At the latest when a component is to be removed from a circuit board, the solder must be removed. There are different methods for this:
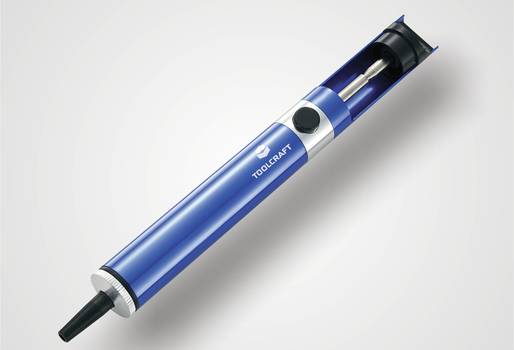
Desoldering suction pump
A desoldering suction pump has a tube made of heat-resistant material at the tip.
The pump is pre-tensioned with a spring and can briefly generate a vacuum at the push of a button.
The soldering iron is used to liquefy the solder at the soldering point. It is often helpful to add some fresh solder when heating the solder joint. The flux added in this way then ensures that all the solder liquefies sufficiently and results in a perfect solder joint.
As soon as the solder is in the flow phase, the tip of the solder suction pump is placed on the solder joint and the pump is triggered. This removes the liquid solder from the solder joint.
If necessary, repeat the process.
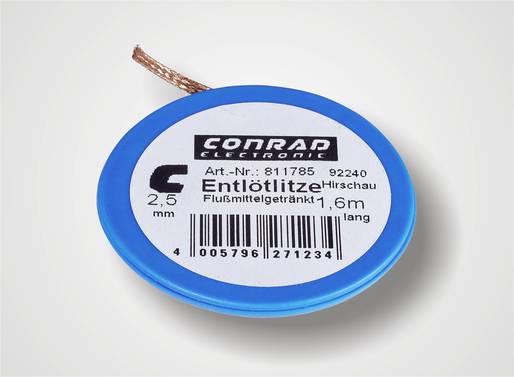
Desoldering braid
A desoldering braid consists of a braid of the finest copper wires that has been impregnated with flux. The braid is placed on the cold solder joint and pressed down with a soldering iron.
The heat from the soldering tip penetrates the desoldering braid and melts the solder in the solder joint. The capillary action draws the liquid solder into the wire.
If any tin residue remains at the solder joint, the "used" section of the wire is cut off and the process is repeated.
As this desoldering method is much gentler than the suction pump, desoldering suction braids are ideal for small solder joints with thin conductor tracks.
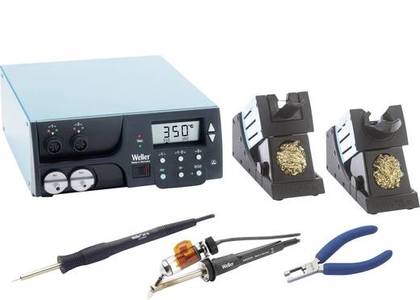
Desoldering devices
In service workshops and electronics laboratories, where a lot of soldering and desoldering is carried out, desoldering devices and desoldering stations have proven their worth. In some cases, soldering and desoldering stations are offered as combined devices.
Desoldering devices have a hollow and heated desoldering tip that completely encloses the solder joint. A vacuum pump provides the vacuum required to extract the hot solder.
Once the desoldering tip has melted the solder at the solder joint, it is automatically extracted.
Depending on the application (wired components or SMD components), there are different versions of desoldering devices.
SMD is the abbreviation for Surface Mounted Device and means surface-mounted component. SMD components have no connecting wires and are therefore placed directly on the circuit board (printed circuit board) and soldered.
SMD technology saves time and costs in industrial production. In addition, the devices are smaller as the placement density can be significantly increased.
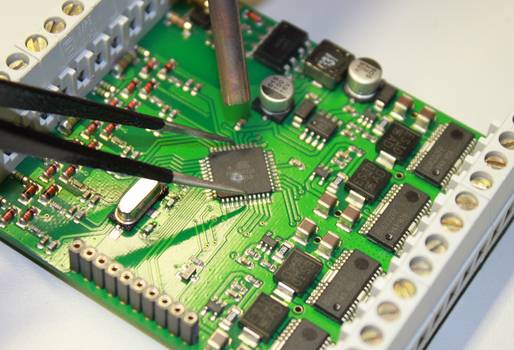
SMD rework soldering, where the delicate solder joints are reworked or SMD components are replaced, requires a great deal of dexterity. While re-soldering sometimes works well with needle-tipped small soldering irons, desoldering is significantly more difficult. This is why special tools are used for SMD soldering:
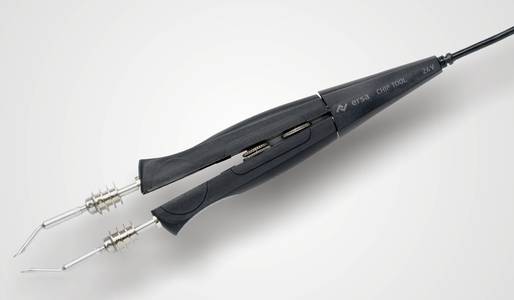
Desoldering tweezers
Two-pole SMD components can be desoldered very easily with desoldering tweezers.
As the name suggests, desoldering tweezers combine a soldering iron and tweezers in one clever device.
When the component is gripped with the desoldering tweezers, the solder joints are heated on both sides. Within a very short time, the solder becomes liquid and the component can be lifted off the board as if with tweezers.
To avoid overheating, the component should then be placed on a heat-resistant surface as soon as possible.
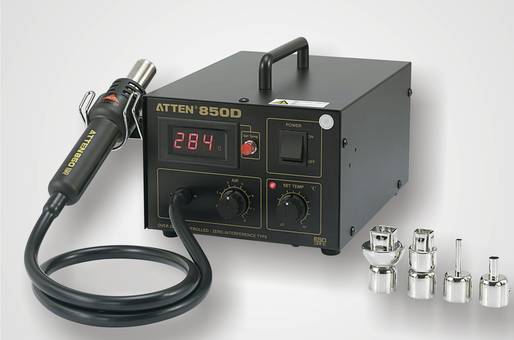
Hot air soldering equipment
If electronic components in SMD technology have several connections, hot air soldering devices are used for removal and installation. With these systems, the heat required for soldering is provided in the form of hot air.
In addition to the universally applicable point nozzles, there are also interchangeable shaped nozzles that are specially adapted to the IC designs. In this way, all the connections of a processor can be removed and the component lifted off the circuit board in a single operation.
Before attaching the new component, the soldering surfaces must be carefully cleaned of solder residue using desoldering braid and alcohol. Solder paste is then applied to the solder contact points. Solder paste is basically solder in powder form that has been processed with flux to form a sticky paste.
Once the connections of the new component have been precisely aligned, the component can be soldered onto the circuit board using the hot air nozzle.
The professional soldering of SMD components is a particular challenge.
This is because the extremely small design means that the tiny components and delicate conductor paths can be destroyed very quickly during soldering.
For this reason, the gentle soldering and desoldering of SMD components should be practiced extensively on old and no longer required circuit boards.
In particular, careful handling of the hot air soldering device must be practiced so that the circuit board is not destroyed by excessive heating.
Aluminum is not as easy to solder as copper or brass, for example. The problem lies in the oxide layer that forms on the aluminum within a few minutes. This layer builds up as soon as aluminum comes into contact with the oxygen in the surrounding air.
In contrast to ferrous metals, where the oxide layer or rust slowly but steadily decomposes the metal, the aluminum oxide forms a kind of seal that protects the material. During anodizing, an oxide layer is specifically applied to the aluminium in order to protect and refine the workpiece.
Welding, hard soldering or soft soldering?
Welding and brazing enable very durable connections, but are technically very complex. They also require a great deal of practice. For this reason, aluminum parts are mainly joined together using the soft soldering process. However, if you want to braze aluminum, you need to pay attention to a few points and use the right tools.
Materials required for soldering aluminum
Soldering torch
As aluminum is a very good heat conductor, a hot gas burner must be used to heat the solder joint to the required temperature of approx. 380 °C.
Aluminum solder
A special aluminum solder is required for soft soldering aluminum. A distinction is made between a friction solder (e.g. AL370 or AL380) and a capillary solder (e.g. AL 390). While a friction solder must be worked into the solder joint manually, the capillary solder flows automatically into gaps and cracks.
Flux
Flux is generally used for soldering. The flux has the task of chemically removing the oxide layer or preventing oxidation of the aluminum during the soldering process. It also improves the flow properties of the solder.
If friction solder is used, the flux can be applied to the solder joint with a brush immediately after cleaning. The flux seals the solder joint and prevents the aluminum from coming into contact with the oxygen in the air. With capillary solder, the solder is coated with flux in solid form.
The soldering process
The melting point of the oxide layer on the aluminum is 1600 - 2100 °C. The aluminum itself melts at 580 - 680 °C. As the oxide layer prevents the soldering process, it must be removed before soldering. This can be done with a stainless steel brush or by grinding.
The solder joint must then be sealed with flux or the soldering process must be initiated immediately. The solder joint is heated to the required temperature using a hot gas torch. Since aluminum does not tarnish or change color when heated, some experience is required to determine when the solder can be applied. If necessary, an IR thermometer can help.
If friction solder is used, the liquid solder must be rubbed into the solder joint with a screwdriver or a small spatula. With capillary solder, the solder flows automatically into the solder joint. Care must always be taken to ensure that the solder joint is at the correct temperature.
The two videos show the processing of the different solders.
After the soldering process, the workpiece must cool down and can then be cleaned of flux residues. As flux is water-soluble, running water and a brush are sufficient for cleaning. If necessary, the solder joint can then be ground and polished.
Our practical tip: Preheat components as required
For solid aluminum workpieces, it makes sense to preheat the components in the oven. The heat dissipation at the soldering point is then not quite as great and the soldering temperature is reached more quickly.
A fireproof stone or brick should be used as a soldering base. A metal plate as a soldering base would dissipate too much heat.
The first soldering tests should be carried out on aluminum remnants in order to gain practical experience. Original parts should only be soldered once you have developed the necessary feel for soldering aluminum.
Soldering in the classroom has a high practical relevance. The technology is part of the curriculum for work and technology lessons at secondary schools and vocational schools. In addition to STEM subjects, soldering is ideal for electronics clubs and project days. The focus is clearly on tips and advice for lessons, as well as for teachers and classes.
