PV fastening and mounting systems » A material guide
Published: 28.02.2024 | Reading Time: 6 minutes
This text is machine translated.
In times of global energy transition and ever-increasing environmental awareness, the use of renewable energies is becoming increasingly important. Photovoltaic systems, which convert sunlight into electrical energy, play a decisive role here. The rapid development of solar technology and government subsidies have made the installation of photovoltaic systems more attractive for both private households and companies.
However, the decision to invest in a photovoltaic system goes beyond the purchase of solar modules. The selection and professional installation of the mounting material are decisive for the efficiency, longevity and economic success of a system.
This is why the selection of PV mounting materials is so important
Why is it so important that people planning to buy a photovoltaic system not only select the system itself carefully, but also do not underestimate the installation? The answer: The right mounting material can have a significant impact on the performance of a photovoltaic system.
This is particularly important when it comes to the efficient alignment of solar modules for optimum sunlight incidence. Correct mounting influences the tilt, alignment and stability of the modules, ensuring that they are exposed to the sun's rays in the best possible way.
Maximum performance thanks to the right installation material
In addition to the quality of the materials used, two other aspects also play an important role. For example, the design influences the alignment of the solar modules and the adaptability to different roof types, while a well thought-out construction enables stable mounting and alignment of the modules.
For example, they must be able to withstand environmental influences such as strong winds, heavy rainfall or temperature fluctuations and guarantee long-term, reliable functionality. All of this together ensures that the system generates maximum energy and improves the overall performance of the photovoltaic system.
Higher initial investment pays off financially
Although high-quality mounting materials may initially require higher investments, they lead to considerable cost savings in the long term. Robust and durable materials significantly reduce maintenance and repair costs and help to minimize the total cost of ownership of the photovoltaic system. Careful material selection therefore pays off not only in terms of performance, but also financially.
It usually takes between three and six months from planning the photovoltaic system to commissioning. The installation of the system itself, on the other hand, is comparatively quick - a specialist company often only needs a few days, depending on the planned size. However, the exact installation process can vary depending on the type of system, the local conditions and any specific requirements.
Rent, buy, location? - Important considerations
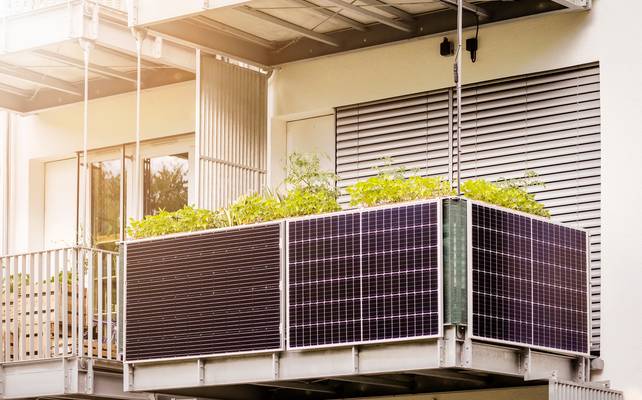
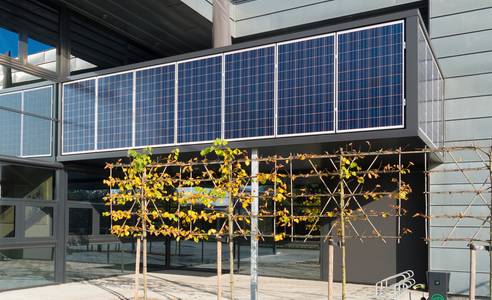
Before we get to the actual installation, we would like to take this opportunity to point out the importance of good planning. This is because you must always ask yourself the following questions at the beginning - whether for yourself or in discussion with experts: Is my roof suitable for a PV system? What do I need to consider if I want to install solar panels on the façade or build a balcony power plant? Do I want to rent a PV system or would I rather buy one?
A site analysis is also recommended: solar radiation, shadows, wind conditions and other environmental factors influence which type of solar module you should choose and how much electricity you can generate. Might trees need to be removed?
Allow time for approval procedures
Once you have decided on a system configuration, you must obtain the necessary permits and comply with local building regulations and environmental requirements. The planned photovoltaic system must also be registered:
Network operator
Registration with the grid operator is required before installation.
Documents to be attached:
- technical data,
- declaration of conformity for inverters,
- clearance certificate,
- site plan,
- wiring diagram,
- commissioning form,
- measurement concept
- photos of the system
Federal Network Agency
In order for photovoltaic system operators to receive financial support under the EEG, the system data must be entered in the market master data register.
The date of receipt by the Federal Network Agency (BNetzA) is decisive for the feed-in tariff. It is therefore recommended that the system is either commissioned at the same time as registration or registered a maximum of 14 days in advance (“planned commissioning”) in order to safeguard entitlements to remuneration and ensure smooth processing of subsidies.
Tax office
Previously, every PV system had to be registered with the tax office as a commercial activity after commissioning and the first grid feed-in. This no longer applies!
Since January 1, 2023, smaller PV systems on or on single-family homes (including garage roofs, carports and other outbuildings) are completely tax-exempt - up to an installed capacity of less than 30 kilowatts.
For so-called mixed buildings, the tax exemption applies up to a maximum output of 15 kilowatts.
The last step in the planning preparation is the selection of the installation method, the arrangement of the solar modules and the positioning of the inverters.
Install it yourself or hire professionals?
Another decision to make: install it yourself or hire professionals? If you opt for the latter, you should contact the relevant specialist companies as soon as possible, as the high demand can lead to scheduling bottlenecks and therefore longer waiting times.
Recommendation: Always have installation carried out by specialists!
In principle, private individuals and non-professionals are permitted to install their solar energy system themselves. However, the prerequisite should be that you have good to very good manual skills and a sound knowledge of electrical engineering.
However, the house and grid connection may only be carried out by a certified specialist company due to the dangerously high voltages of more than 125 volts!
>> We recommend professional installation by certified specialists. Even minor errors can cause safety risks, reduce the service life of the system, invalidate the guarantee or invalidate the insurance cover.
There are several installation methods for photovoltaic systems, which can vary depending on the location, building structure and individual requirements.
Choosing the right mounting materials for photovoltaic systems depends heavily on the specific mounting method and can vary depending on the specific requirements of the project and local building regulations. In general, care should be taken to choose high-quality and durable materials to ensure the efficiency and safety of the photovoltaic system.
Here are some essential materials that are commonly used in different mounting systems:
Elevation
Solar modules are mounted on special module brackets, racks or stands to achieve an optimum inclination for solar radiation.
Ballast material
In flat roof mounting systems with ballast, materials such as concrete blocks or other heavy elements must be used to ensure the stability of the system.
Fastening elements
Screws, nuts, washers and other fastening elements are crucial for connecting the various components of the assembly structures.
Roof hook
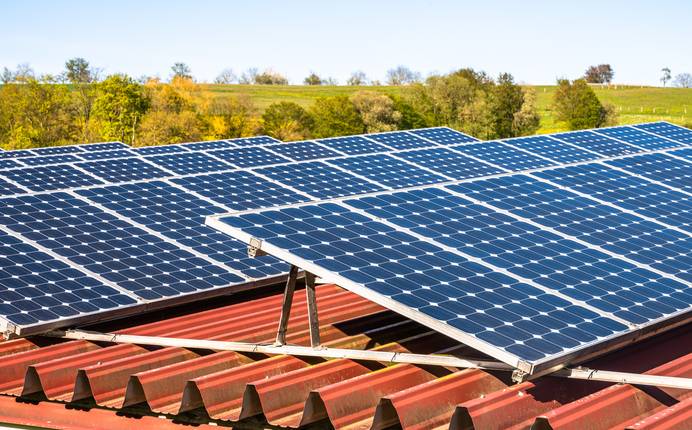
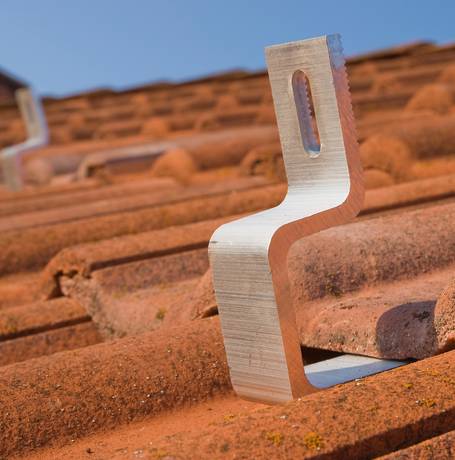
For on-roof installation, roof hooks connect the mounting rails onto which the solar modules are clamped to the roof cladding. They are used for all types of tiled roofs. Different roof hooks must be used depending on the type of tile.
If you want to mount your PV system on a sheet metal roof instead, you will need screws to fasten the substructure.
DC isolator
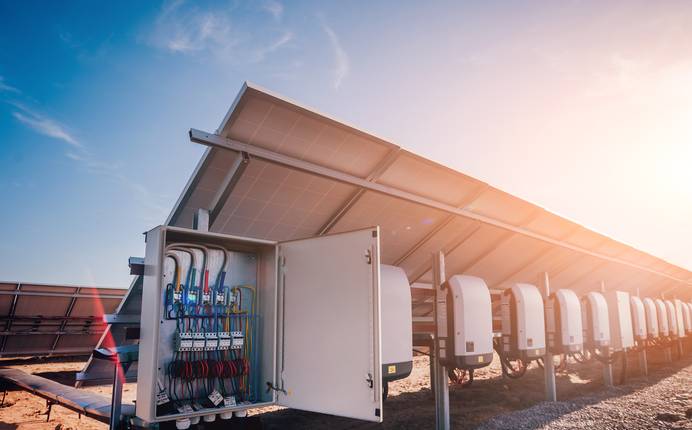
DC disconnectors are used to disconnect the DC circuit of a PV system if necessary. For example, for maintenance work or in the event of an emergency situation.
Sealing materials
For on-roof installations, sealing materials such as rubber seals, sealing tape or silicone are required to ensure that the roof remains watertight.
Ground anchor
If the photovoltaic system is mounted on the ground/an open area, stable ground anchors or fastenings must be used to anchor the mounting structure in the ground.
Earthing
PV systems must always be connected directly to the main earthing busbar of the building with protective equipotential bonding or protective earthing. Earthing is important to ensure the electrical safety of the system and ensures that excess electrical charge is safely discharged to earth. It also minimizes the risk of damage from lightning strikes.
Cable management
Cable ducts and cable brackets are important for neatly routing and protecting the cabling between the solar modules and the inverters.
Mounting rails
The purpose of aluminum profile rails or steel beams is to securely fasten the photovoltaic modules to the roof during rooftop installation. They serve as support points and form the basic structure on which the modules are mounted. In addition, wind and snow loads are distributed evenly across the substructure.
If the modules are mounted in portrait format, two horizontal mounting rails per module row are usually sufficient to securely attach the solar modules. Two additional vertical rails are required for landscape installation.
Mounting brackets / clamps
Brackets or clamps are used to securely fasten the solar modules to the mounting rails as well as to the inverters and other electrical components. They are anchored and screwed into the joints of the mounting rail, but should also allow the modules to expand thermally.
As a rule, the PV modules are fixed to the mounting rails with four clamps each and connected to each other using center clamps. End clamps are used at the edge of the roof.
Fuses
Fuses protect the PV system against overload and short circuits. They are used in the electrical wiring of the system to ensure safety.
Solar cable
Solar cables are special cables that are used in photovoltaic systems to establish the connection between the solar modules, the inverter and other components. They are also known as string cables. As they are often exposed to extreme temperatures, especially in sun-exposed environments, they are extremely temperature- and UV-resistant. They are also particularly robust, have high abrasion resistance and are resistant to acids, alkalis, ammonia and ozone.
Solar cables usually always come in pairs in a plus and minus set. They are usually color-coded for better differentiation: red cable = positive polarity, black cable = negative polarity.
Solar panels
The most important part of any PV system is, of course, the solar modules. A distinction can be made between three types of panels: Monocrystalline, polycrystalline and thin-film modules. Each type has certain advantages and disadvantages, although it can generally be said that
- Monocrystalline solar cells have the highest efficiency and are particularly suitable if you have limited space available.
- Polycrystalline solar cells have the better cost-benefit ratio and are therefore the most commonly used.
- Thin-film cells are comparatively light, but have the lowest efficiency.
Plug connector
Connectors are used to connect the solar cables to each other and to establish a connection between the solar modules and the inverters.
The solar cables are usually connected to the solar modules using special connectors, such as MC4 connectors. These connectors are waterproof and enable a secure connection.
Inverter
The inverter converts the direct current into usable alternating current and must therefore be connected to both the PV system and the domestic power grid.
If the inverters are not installed in the immediate vicinity of the solar modules, special mounting systems are required to secure them safely.
Mounting a photovoltaic system requires specialized equipment and tools to ensure that the installation is done efficiently and correctly. Here are some essential accessories and tools for installing PV systems:
Tools:
- Drill
- Wrench and screwdriver
- Allen key
- Pliers and crimping pliers
- Cable cutter
- Roof hook installation tools
Assembly and installation material:
- Screws, nuts, washers and bolts
- Roof hooks or clamps
- DC connection cable
- Connecting plugs
- DC fuses and fuse holders
- Junction boxes
Measuring devices:
- Multimeter (For checking voltages and currents during installation.)
- String tester (For testing the performance of solar module strings.)
Safety first!
The installation of photovoltaic systems - especially on roofs or façades - requires careful safety measures to prevent accidents and protect the health of workers.
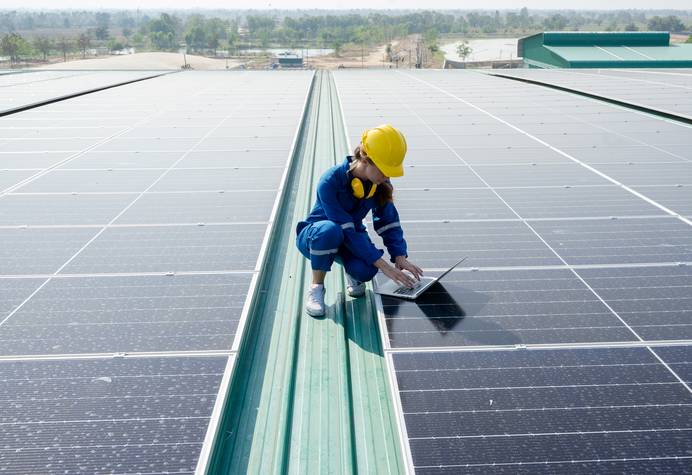
- Wear suitable equipment such as safety helmets, work gloves, safety shoes, safety goggles and hearing protection to minimize injuries.
- Use safety harnesses and ropes when working at height.
- Avoid installation in bad weather conditions such as strong wind or rain to minimize the risk of accidents.
- Switch off the power supply before installation or maintenance to minimize the risk of electric shock.
- Ensure that all electrical installations comply with the applicable standards.
- Use stable ladders for safe access to the work site.
- Install temporary safety railings or safety nets to prevent falls.
Once all the planning has been completed, all the approvals have been obtained and the required materials have been ordered and delivered, the PV system is finally installed:
1. Mounting the substructure
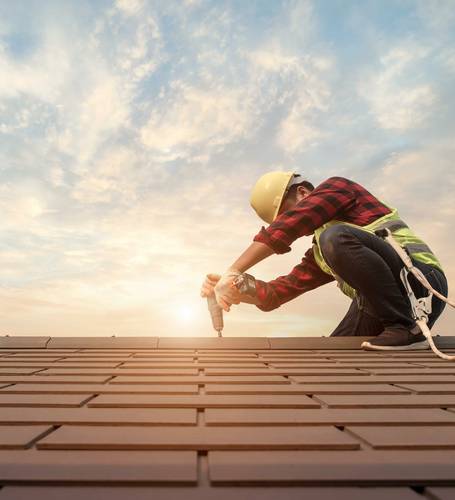
The first step is to install and fasten the substructure. The procedures and materials required vary depending on the type of installation. For example, roof hooks and mounting rails must be attached for on-roof installation.
Depending on the type of installation, the most important installation materials for this step include
- Roof hooks (height-adjustable)
- Fixing screws
- Mounting rails made of aluminum or stainless steel
In general, this step is very labor-intensive and possibly the most time-consuming. Once the substructure is firmly anchored, the rest goes relatively quickly.
2. Connecting the DC cabling
The next step is to lay the solar cable on the mounting frame. Only then can the solar modules be mounted - at least if it is a roof installation. The DC cable connects the solar modules to the inverter so that the DC current generated by the PV system can be converted into direct current. There are two options for wiring:
Series connection
This is currently the most common type of connection. Here, the solar modules are connected in series as a so-called module string with a single solar cable that runs through all modules to the inverter. Two to three strings are common.
They have the advantage that less material (cable) is required and installation is quicker. However, the weakest link in the chain also determines the output. If one of the solar modules can generate less power due to shading, for example, this has a negative effect on the output of the entire module string.
Parallel connection
With parallel connection, each solar module is individually connected to the inverter. Although this leads to an increased need for solar cables and slightly extends the installation time, it also results in a noticeably lower power loss for the entire photovoltaic system if one of the modules temporarily generates less power.
The advantage is that the power loss is not transferred to the entire string, as would be the case with series connection.
3. Mounting the solar modules
Once all the solar cables have been laid, it is time to attach and wire the solar modules. The DC cabling is routed through the roof at a specific point. Usually, a roof tile is replaced with a special tile with a cut-out for the cable. Alternatively, a similar cut-out can be used on the tile as is made when installing roof hooks.
The solar modules can be positioned on the scaffolding in various ways. For smaller installations, this can be done by hand on site, while a lifting platform is often used for larger projects. One or two craftsmen then move the solar panel to the intended position on the roof using the lifting platform.
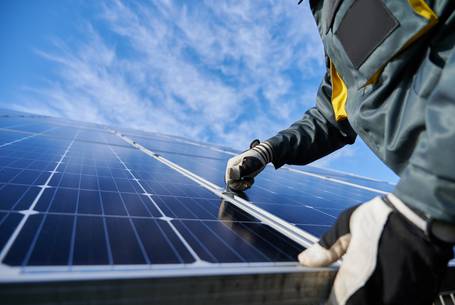
The two solar cables are then connected to the neighboring modules from the underside using plug contacts or MC4 solar connectors and secured with cable ties. The solar module is then mounted using the mounting clamps.
During installation, it is particularly important to pay attention to the alignment of the PV modules to ensure a uniform appearance at the end. Once installation is complete, a measurement is taken to ensure that all modules are connected correctly.
4. Installing the inverter and overvoltage protection
Once the solar modules have been installed and wired, the final step is to install the inverter and surge protection. As the inverter converts direct current into usable alternating current, it must be connected to both the PV system and the domestic power grid.
The PV inverter is usually installed in the utility room (alternatively in the loft or garage), whereby a suitable, protected location is important. It should be protected from the weather but well ventilated. For installation, the positive and negative cables of the solar modules are connected to the corresponding inputs of the inverter.
The overvoltage protection is installed near the inverter, ideally in a fireproof small distribution board. The inverter is installed in accordance with the manufacturer's instructions, as is the wiring of the solar cables from the solar modules to the inverter. Correct polarity and secure connection are crucial.
Despite the possibility of self-installation of the majority of the PV system, the grid connection must always be carried out by an approved electrical installation specialist. This also applies to the connection of the inverter to the domestic power grid.
Optional: Lightning protection
Although a photovoltaic system does not increase the likelihood of a lightning strike, in some regions it is still advisable to install lightning protection devices to protect the system from damage.
After all, it is not only direct strikes that are dangerous. A lightning strike in the vicinity can also damage your own solar system due to the high voltages and electrical currents it generates. It is therefore worth installing a few extra measures in addition to the standard overvoltage protection of the PV system:
- Lightning conductors on the roof conduct the lightning energy safely to the ground.
- Earthing system: All metallic components of the PV system should be properly earthed, including solar modules, mounting systems and inverters. Potential equalizers also ensure that all solar modules are evenly grounded. Earthing conductors should run along the DC cabling and between the solar modules to safely conduct lightning energy into the ground.
- Lightning protection for DC cabling: Lightning protection devices at the DC inputs of the inverters prevent the DC path from being damaged by overvoltages.
- DC disconnectors and switch-off: DC disconnectors can be used to safely disconnect the PV system from the power grid in the event of a thunderstorm (or during maintenance work).
5. AC cabling
Once the inverter has been installed and the AC cabling to the electricity meter has been completed, the solar system is ready for operation and starts generating electricity.
When selecting the electricity meter, it is important to ensure that it can measure both the electricity drawn and the electricity fed into the grid. A bidirectional meter is often used for this purpose.
Modern smart meters are an advanced option that can be flexibly programmed and provide real-time consumption data. These offer versatile functions for precise monitoring of electricity generation and consumption.
6. Optional: power storage unit and wallbox
Once the photovoltaic system has been fully wired and commissioned, an electricity storage unit can be installed and connected to the power grid. You can do this step yourself or leave it to a specialist company, although particular care must be taken when installing the storage unit and the inverter.
Please note that the installation of an electricity storage system significantly increases the installation effort. In most cases, an additional inverter is also required for the battery storage system, although modern hybrid inverters can combine both functions.
If you also want to install a wallbox, now is also a good time. However, this can also be done in parallel or before the solar modules are installed.
7. Inspection, test run, measurement
The installation of the photovoltaic system is complete. Now it's time to check everything and carry out a test run to make sure everything is working properly. This includes a test run to measure the power generation and the functionality of the operating system, such as an app.
>> Check connections
- Are all connections and cables tight? Are contacts secure?
- Are there any damaged or worn cables? If yes, replace immediately.
- Carefully document all measures carried out.
>> Check mains connection
- Ensure that the PV system is connected to the power grid and have it checked by a qualified specialist.
- Carry out acceptance processes, tests and measurements in accordance with applicable standards and directives.
>> Perform function test
- Are all components of the PV system working properly?
- Check the solar modules, AC output of the inverter and, if applicable, the functionality of the energy storage system.
- Electrical values must meet the expected specifications.
>> Create a maintenance and cleaning plan
- Observe the manufacturer's instructions and recommended intervals.
- Regularly check for dirt and damage.
- Clean the surface, inspect wiring and connections and monitor performance as part of the maintenance schedule.
Important: Always keep documents and logs!
Please note that all relevant documents, including installation logs, commissioning reports, manufacturer certificates and test results, must be stored properly. Also check once again whether all necessary approvals and reporting obligations were complied with during assembly and installation.
