Photovoltaics » Calculate solar system correctly
Updated: 07.04.2022 | Reading time: 7 minutes
This text is machine translated.
A gazebo in the countryside, a cabin on the edge of the forest or a cottage by the lake are all great things. As is a camping vacation with your own caravan. But as wonderful as nature-based recreation is, it often lacks the important basic supplies of electricity and water. When it comes to water supply, you can easily make do with drinking water from canisters and rainwater for watering.
Unfortunately, things are not quite so simple when it comes to the power supply. However, this does not mean the installation and wiring of a 12 V solar system. The installation of a photovoltaic system (PV system) can be done quite easily and without great effort by skilled craftsmen.
Rather, it is a matter of determining the right components for your own photovoltaic system so that the consumers to be operated can also be reliably supplied by the system.
In order to be able to calculate and determine the components of a PV system as a stand-alone solution, it is necessary to work from “back to front”, so to speak.
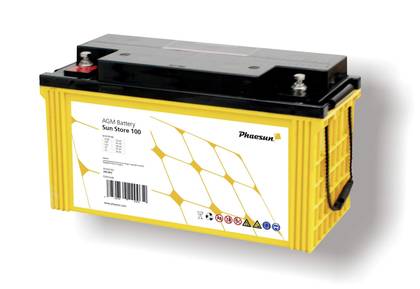
In plain language, this means that the power of the respective electrical devices must first be determined and the operating times defined. The size of the required solar battery is then based on the values determined.
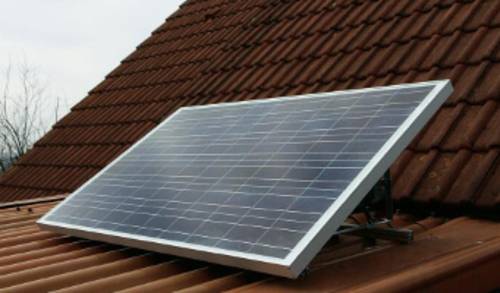
The solar module must be the optimum size so that the energy taken from the battery can then be recharged promptly. Once the size or output of the solar module has been determined, the appropriate charge controller can be selected.
We have explained the individual steps for calculating a solar system in more detail below. By the way: The online calculator we provide works in the same way.
The first step in planning your own solar energy system is to determine the power requirement. To do this, the output of the consumers to be operated must first be determined. The power in W (watts) is specified either on the appliance or in the technical data sheets.
In some cases, the current consumption in mA (milliamperes) or A (amperes) is also specified instead of the power.
If neither the power nor the current consumption is specified, the current must be measured using a multimeter or clamp ammeter. We have explained how to do this on our guide page for multimeters.
If a current of 0.5 A is measured at a voltage of 12 V, the power (P) can be calculated using the following formula:
P = U x I (12 V x 0.5 A) = 6 W
Important:
The lower the output of the loads to be operated, the smaller and more cost-effective the solar module required. For this reason, it makes sense to use economical 12 V LED lamps instead of lossy 12 V halogen lamps. This is because an LED reflector light source with a power consumption of just 4.6 watts produces almost the same luminous flux as a 35 watt halogen lamp.
In addition, consumers that can be operated with 12 V DC voltage should be selected. This is because an additional inverter is required for 230 V appliances.
Note:
For consumers such as radios and amplifiers, the current power consumption depends on the volume. At room volume, the power consumption is significantly lower than the maximum power specified in the technical data.
Some more information on refrigerators:
Calculating the energy requirement of a refrigerator is problematic, as the compressor for cooling does not run continuously. The ratio between running and pause times depends on many factors such as ambient temperature, set cooling temperature, insulation and fill level. Another factor is how often and for how long the refrigerator door is open.
When operating a 230 V refrigerator via a 12 V inverter, you should note that the power consumed by the refrigerator at the moment the compressor is switched on is approx. 10 times higher than the continuous power during operation. Not every inverter is designed for such high inrush currents.
Just as important as the power consumption of the loads is, of course, their operating time. This is because it plays a major role whether a load needs to be supplied with power for 30 minutes or 3 hours. Especially if the appliance requires a lot of power. The information on the operating time is included in the calculation of the required energy demand (see following paragraph).
Once the power and operating times have been determined, the actual energy requirement can be calculated. If there are different consumers and/or different operating times, the value for the energy requirement must be calculated separately and the results then added together.
Example:
In our calculation example, we assume that 2 lamps with 6 W each are to light up for two hours in the evening and 1 lamp with 10 W is to be in operation for 30 minutes. In addition, there is a 12 V television with 30 W, which must be supplied for one hour.
2 x 6 W = 12 W x 2 h = 24 Wh
1 x 10 W = 10 W x 0.5 h = 5 Wh
1 x 30 W = 30 W x 1 h = 30 Wh
The electrical work required for all loads is therefore 59 Wh (watt hours). If required, other consumers are determined according to the same scheme and the result is added to the 59 Wh.
For a solar system with a 12 V solar battery, the energy requirement of 59 Wh corresponds to a battery capacity of 59 Wh : 12 V = 4.92 Ah (ampere hours). This means that in order to be able to supply all consumers over the specified period, the storage battery must provide a capacity of 4.92 Ah.
To ensure that the battery is not discharged too deeply and thus falls into cycle operation (complete discharge and recharge), the capacity drawn should not exceed 20% of the battery capacity. In this case, the solar battery must have a capacity of at least 24.6 Ah.
Manufacturers always state the maximum peak power (Wp = watt peak) in the technical data for solar modules. However, this value is only achieved when the sun shines on the module at a full 90° angle. As soon as the irradiation or the angle is not right, the module output drops. In practice, it has been found that a solar module delivers approx. 45% of its peak output over a period of 8 hours on an average sunny summer day.
In order to recharge the energy required from the calculation example into the battery, the solar module must be calculated as follows:
(59 Wh : 8h) : 0.45 = 16.39 W
The solar module must therefore have a peak power of 16.39 Wp or more.
Our practical tip: Positioning depending on the position of the sun
Due to the position of the sun, a solar module must be positioned at a steeper angle in spring and fall than in midsummer. For this reason, an adjustable bracket for the solar module is recommended. If this is not possible, the module should be positioned more steeply so that the optimum yield (harvest) is achieved in spring and fall. In midsummer, the excessively steep angle is compensated for by the longer duration of sunshine.
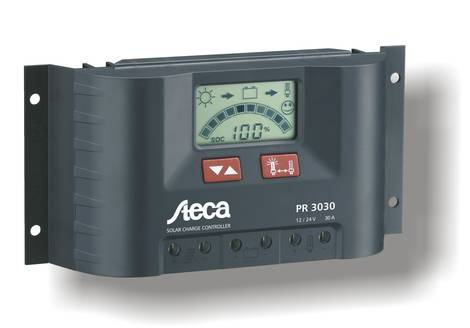
When selecting the charge controller, the module current is the most important selection criterion.
This is because when the solar battery is fully charged, the charge controller disconnects the solar module from the battery and establishes a conductive connection (short circuit) between the module connections. This prevents the voltage generated by the solar module from becoming too high and damaging the solar module.
The module current of the charge controller must therefore be equal to or greater than the short-circuit current of the solar module used. If several solar modules are connected in parallel in a PV system, the sum of the short-circuit currents of all modules is decisive.
In some cases, the charge controllers also monitor the loads. If a load discharges the solar battery too deeply during a rainy period, the controller disconnects the load from the battery in good time.
Our practical tip: Choice of charge controller
If you are planning to expand your PV system at a later date, you should not skimp on the charge controller and choose one with a higher module current. This will allow you to connect another solar module or an additional electricity storage unit later on without having to change the charge controller. When wiring the charge controller, a cable with the largest possible cross-section should be selected. This will keep the line losses for the solar power as low as possible. If necessary, you can refer to the technical data of the charge controller to find out which cable cross-sections the connection terminals are designed for.
Calculating a photovoltaic system or carrying out a solar calculation is quite simple in principle. You just have to follow the steps described above. Setting up and commissioning a photovoltaic system is just as easy. After that, the issue of electricity costs is no longer relevant for you. This is because the solar-generated electricity is free and your photovoltaic system no longer incurs ongoing operating costs. These are really good reasons to opt for solar power.

