Build your own LED solar light
Updated: 13.04.2022 | Reading time: 11 minutes
This text is machine translated.
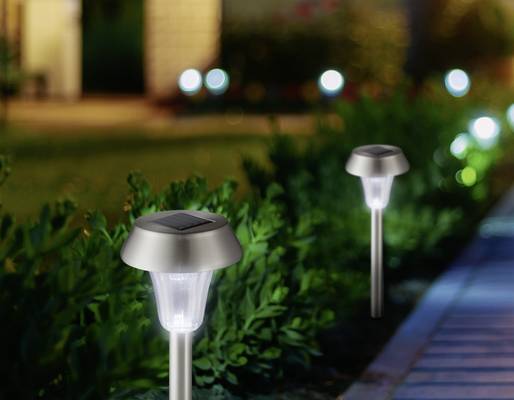
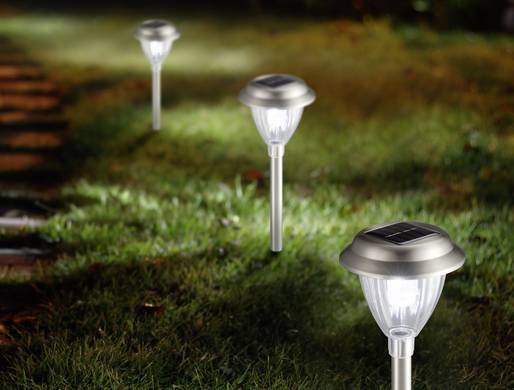
Solar lights are very popular with many people. On closer inspection, this is not surprising. After all, solar lamps provide discreet yet eye-catching illumination in gardens, plots, flower beds or even on patios and balconies.
But that's not all. Installation and commissioning are extremely simple. No cables need to be laid or connections made. Simply unpack, set up and you're done. That's why we at Conrad have put together a very comprehensive range for our customers.
But there are other good reasons that speak in favor of these clever lights. The technology is now so sophisticated that the lights work excellently and there are no ongoing operating costs.
But best of all, when it comes to environmentally friendly garden lighting, you don't just have to rely on ready-made products off the shelf. We explain the technology behind the clever solar lamps and how easy it is to build your own DIY (do it yourself) solar light.
The principle of harvesting something and preserving it for later use is an ancient one. What has been tried and tested with food for thousands of years also works perfectly with heat and light in our modern world. But that's not all! It also works on a small scale and without great effort.
Since LEDs have become powerful light sources, you can build the most beautiful solar LED lights yourself with a compact solar module, a small battery and some electronics.
DIY solar LED lights offer the same advantages as commercially available solar garden lights:
With little installation effort and no ongoing operating costs, the DIY lights provide pleasantly discreet lighting. And they are fully automatic.
But the best thing of all: unlike ready-made solar garden lights, you have all kinds of options when designing your own solar LED lights. Build your own individual solar-powered lamp with an unmistakable design for your garden, balcony or patio.
The functional principle of a do-it-yourself solar light is quite simple and therefore a self-built light consists of just a few components:
Solar module
The solar module converts the sun's rays into electricity. At the same time, the solar panel serves as an indicator as to whether the lighting can already be switched on. As only a single-cell battery needs to be charged, a solar module with a voltage of 2 V is completely sufficient.
Storage battery
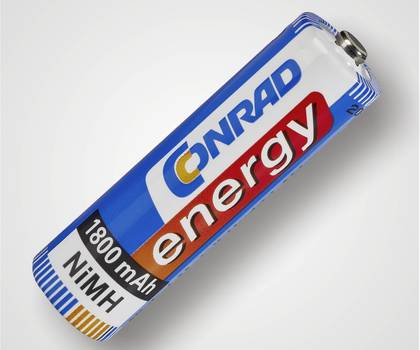
As the solar module only provides limited power due to its size, many solar lights are equipped with a standard 1.2 V NiMH rechargeable battery in the Mignon design. The battery is used to store the power from the solar panel and to power the LEDs at night.
Luminaire housing
From grandma's nostalgic preserving jar to a commercially available jar with a screw cap - you have every conceivable option when choosing a suitable housing for your self-made solar garden light.
But it's not just the size and shape of your light that you can choose.
With the right colors or colorful foils, some decorative accessories and a little creativity, a simple glass lamp can be turned into a cool design object in no time at all.
But be careful:
As the solar light is used outdoors, it is essential to ensure that the electronics are well protected from moisture.
The electronic heart of a solar LED lamp is the control electronics, which are designed as a small integrated circuit (IC). These ICs can be labeled ANA618, CL0116; YX8018 or even QX5252F. The function of the ICs is generally almost identical, but the pin assignment and technical data are different.
Charging in the sunshine
A QX5252F can be used to explain the circuit and how it works quite simply:
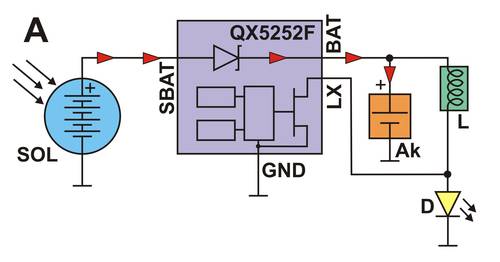
When the sun shines on the solar module (SOL), the electricity generated by the solar module is charged into the battery (AK) (see red triangles in sketch A).
A Schottky diode in the QX5252F ensures that no current can flow from the battery back into the solar cell in the dark.
The voltage applied to the battery (approx. 0.9 to 1.4 V depending on the state of charge) is simultaneously conducted via the coil (L) to the light-emitting diode (D). However, the voltage level is not sufficient to light up the LED.
Glow in the dark (build-up of the coil field)
At dusk, when the solar module is no longer supplying voltage, the QX5252F IC switches the LED on.
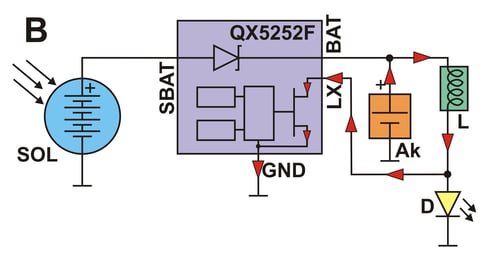
For this purpose, the LX connection is switched to ground (GND for ground) via an internal field-effect transistor.
The current (see red triangles in sketch B), which now flows via the coil (L) and the IC to ground, immediately builds up a magnetic field in the coil.
As the LED (D) is short-circuited via the transistor in the IC QX5252F at this moment, it cannot light up.
Lights up in the dark (switch on the LED)
As soon as the magnetic field of the coil (L) is built up, the transistor in the QX5252F blocks again. As the current through the coil is thus switched off abruptly, the magnetic field of the coil also collapses just as quickly.
This collapsing magnetic field generates (induces) a voltage peak in the coil (L), which is added to the existing battery voltage.
At this moment, the coil acts as an additional voltage source, so to speak, which is connected in series with the battery. The resulting total voltage is now high enough to cause the LED (D) to light up briefly (see sketch C).
Experts refer to this circuit concept as a step-up converter.
However, as the LED should not just flicker briefly but light up continuously, the switching process described above is repeated several tens of thousands of times per second. The very high switching frequency creates the visual impression of a uniformly lit LED.
When the solar cell supplies sufficient voltage again at daybreak, the LED is switched off and the battery is charged for the next night.
Safety shutdown included
An internal voltage monitor in the QX5252F switches the LED off when the battery is almost empty, thereby preventing a damaging deep discharge of the battery during lighting operation.
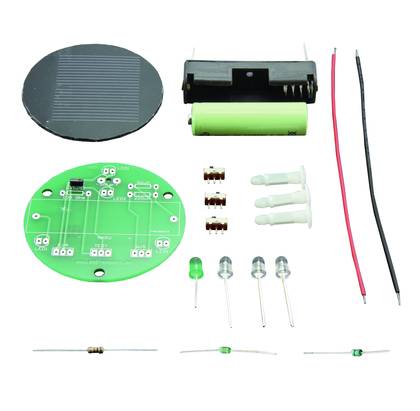
In principle, it is no problem to obtain the components listed above individually from Conrad Electronic. This gives you the advantage of individual design and whether you want to use white LEDs or perhaps red LEDs as a light source. However, you should have a sound basic knowledge of working with electronic components. However, it is easier and cheaper to use a kit or set that contains all the electronic components required for construction. This also offers the great advantage that all components are matched to each other and the finished circuit works without any problems. An interesting representative from the solar lamp kit group is the “Cucumber glass lamp” soldering kit from Sol Expert.
Special features of the circuit
Before starting the assembly, it is worth taking a look at the circuit diagram. In addition to the standard solar lamp circuit already mentioned, this kit also has other special features:
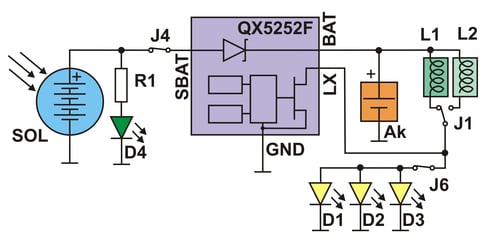
1. three LEDs (D1 to D3) are used for lighting, which are switched on and off via switch J6 (I/O). This allows the lighting function to be switched off when the battery is empty until the battery is fully charged again.
2. the kit has two coils (L1 with 220 µH and L2 with 56 µH), which are switched on alternately with switch J1 (S/W). Due to the different inductivities, different LED currents are induced. Coil L1 generates an LED current of 15 mA and is intended for economical winter operation. Coil L2 generates an LED current of 50 mA and is to be used in summer operation.
3. a green LED (D4) and a series resistor (R1) are connected to the solar module. When switch J4 (TEST) is opened, the current from the solar module flows through the series resistor and the LED when the sun is shining. This allows the correct function of the solar module to be tested.
Structure of the circuit
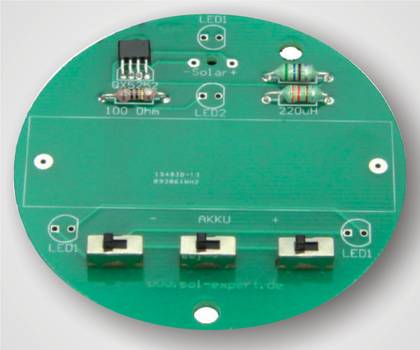
With the exception of the solar cell, all the required components are mounted on a central circuit board. This idea has the charm that all components have their fixed place and do not have to be connected with “flying wiring”.
As the number of components to be installed is quite manageable, there is virtually no risk of confusion. Even electronics beginners will have no problems setting up the circuit. Provided that you follow the manufacturer's detailed assembly instructions exactly.
Due to the simple and clear structure, this kit is also ideal for schools or training companies.
The topic of solar LED lights can be taught easily, clearly and in a practical way. In addition, the first soldering experience can be gained at the same time.
Important:
As the soldering iron, the solder and the soldered components become very hot during soldering, appropriate caution is required. Children and young people should only carry out the necessary soldering tasks under adult supervision.
Pay attention to the correct polarity of the components
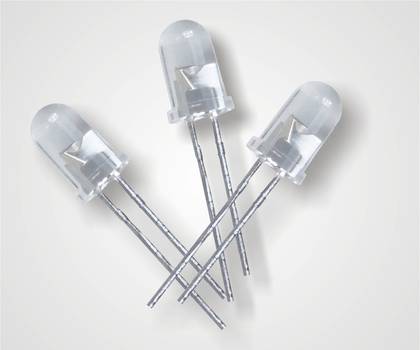
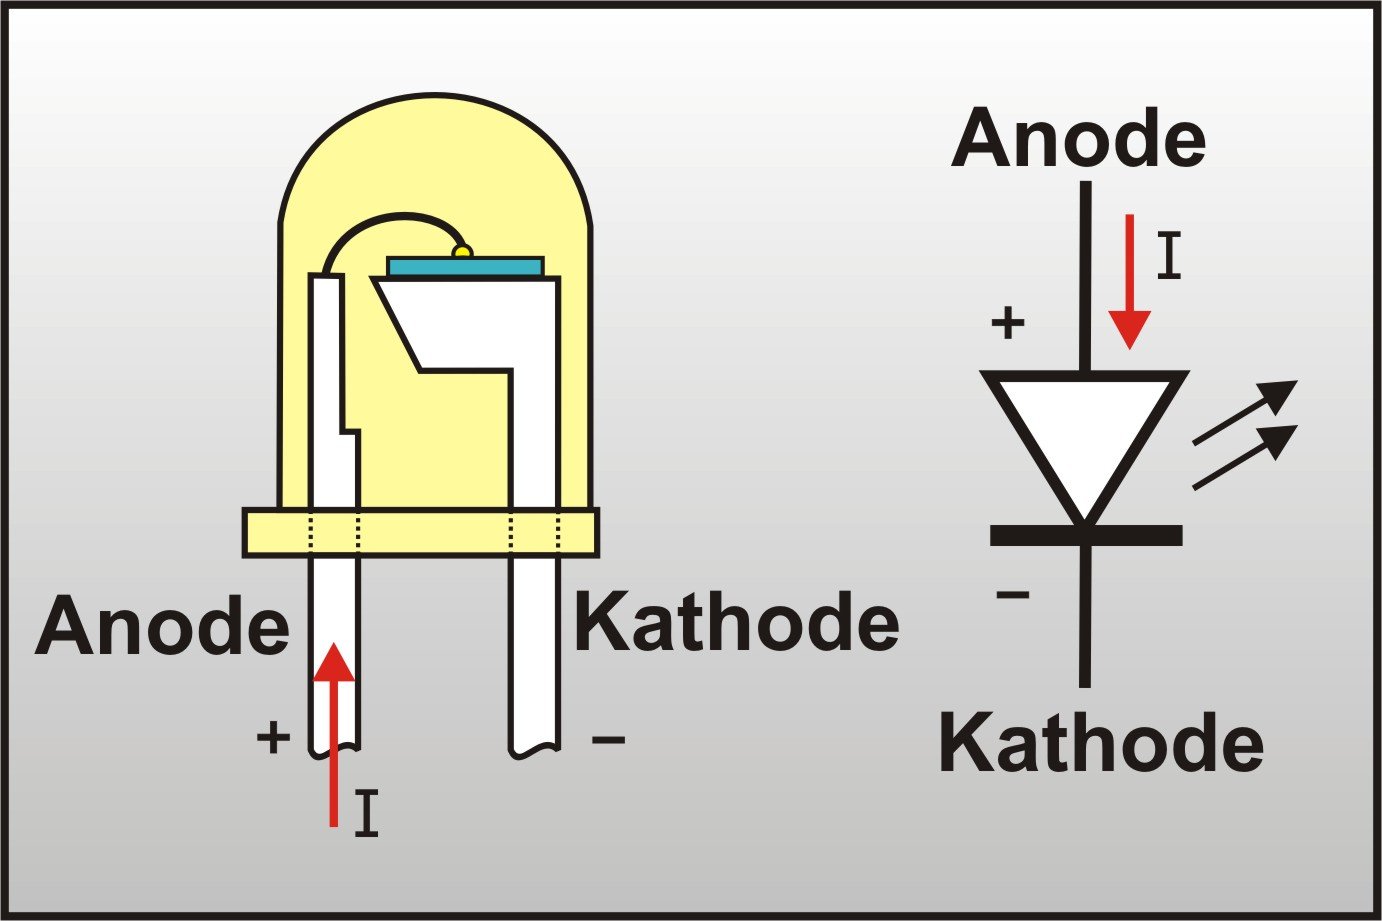
When installing the four LEDs, ensure that the polarity is correct. As LEDs only allow current to pass in one direction, they will not emit any light if they are soldered into the circuit board the wrong way round.
For this purpose, the LEDs have a shorter connecting wire on the cathode or the LED housing is flattened on this side.
Note:
Incorrect installation generally has no negative consequences for the LED. It will not be damaged. For the LED to function correctly, it simply needs to be desoldered and reinstalled correctly.
Installation in a canning jar
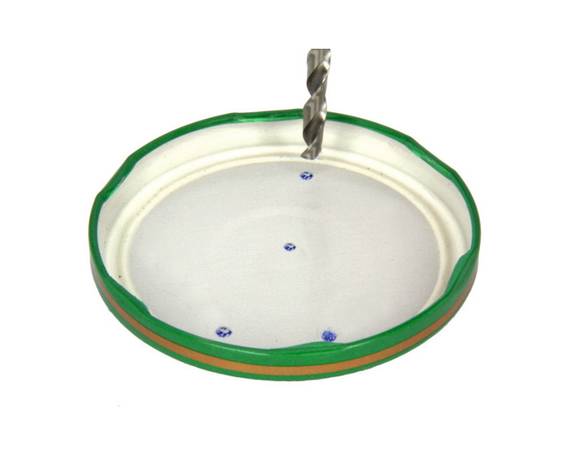
As already mentioned, installation in a wide variety of “lamp housings” is possible. The following construction steps show the installation of the electronics in a canning jar
Note:
If you are using a preserving jar with a glass lid, the solar module must be attached to the inside of the glass lid. Three to many adhesive dots are sufficient for this. Waterproof all-round bonding is not necessary. The heads of the spacers are then glued to the underside of the solar module.
Personal touch in the final design
A wide variety of materials can now be used to decorate the lamp.
It is particularly attractive if the glass base is covered with seasonal decorative elements or the LEDs shine through colorful foils.
The glass can also be painted from the outside with window paints or from the inside with spray paint cans from the DIY store.
Let your creativity run wild.
The solar light is not working.
If a solar lamp does not emit any light, a visual inspection often helps quickly. The first thing to check is whether the solar module is still clear or already milky. Unfortunately, replacing a milky solar cell is not worthwhile as the cells are often not available or are more expensive than complete lamps. The next step is to check the battery contacts. As the lamps are exposed to the weather, corrosion can easily occur here. If the contacts are in order, the wiring must be checked. The thin wires that connect the electronics to the solar cell and the battery often break off directly at the soldering points.
Another source of error may be existing function switches that do not make proper contact. If the visual inspection does not provide any useful results, the voltage at the battery and at the solar cell (when facing the sun) must be measured with a multimeter. If the results are not conclusive, check the short-circuit current of the solar cell or the charging current of the battery.
The solar light only lights up briefly.
This is a classic sign that the battery is not fit. In this case, it is often sufficient to regenerate the battery in a charger. To do this, the battery is charged and discharged several times until it is fully charged again. At the same time, the contacts of the battery and the battery box can be checked and cleaned. When replacing the battery, the battery type must be taken into account. In addition to the usual Ni-MH batteries, manufacturers now also use Li-Ion batteries.
The LED in the solar lamp does not light up at night but when the sun is shining.
In this case, the current flow to the battery is interrupted. Instead, the current from the solar cell flows directly via the LED. The cause may be oxidized battery contacts, a high-resistance battery or a broken cable or a cold solder joint on the battery slot.
Faults in solar garden lights can often be quickly identified and easily rectified. Especially if you understand the technology and have a little talent for tinkering. And since most faults are caused by the effects of moisture, many garden lights can be given a second life without much effort.
/experimentier-solarmodul.jpg?x=420&cdx=420&cdy=350&cox=0&coy=0)
