Woodwork during renovation » Tips for renovating with wood
Published: 24.11.2023 | Reading time: 9 minutes
This text is machine translated.
In addition to embellishing walls with paint or wallpaper, it is sometimes also necessary to renew the floor or renovate the ceiling.
Easy-care click parquet or laminate flooring is a popular choice. And for the perfect ceiling design, panels are offered in a wide variety of shapes and colors.
However, many people turn away prematurely at the very idea of the amount of work required. This is because they believe that the installation is extremely complex and must therefore be carried out by woodworking specialists. This is not necessarily the case.
All you need is a little manual skill, the right tools and an experienced helper at your side. Then you can easily install the wooden ceiling in the living room or lay the floor in the office yourself and save a lot of money in the process.
Whether flooring, wooden ceiling or wall cladding: When renovating, the right choice of material is always crucial. Then the result will look perfect in the long term. However, it is not just personal taste or a preference for a particular design that plays an important role in the selection process. The expected loads and influences must also be taken into account. After all, ceiling panels are exposed to completely different influences in the kitchen or bathroom than in the living room.
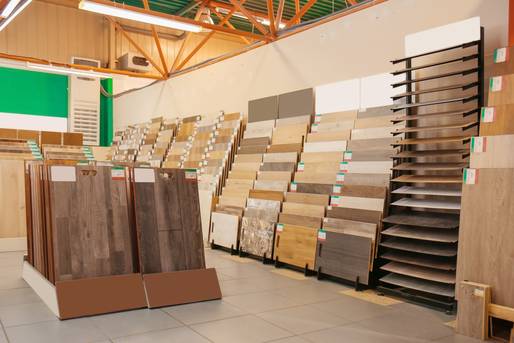
The same applies to floor coverings. Whether laminate, vinyl or parquet is the preferred choice for the planned interior fittings should be clarified in a specialist store on site. This will also tell you what the advantages and disadvantages are and what the subfloor must be like.
You can also use this opportunity to determine whether the floor can be laid floating, i.e. without a fixed connection to the subfloor, or whether it needs to be glued down. Any underfloor heating must also be taken into account when selecting the material. Whether the selected floor covering can really withstand the expected loads in the long term can be seen from the service class indicated by the manufacturer.
Our practical tip: usage classes
The service class (SC) indicates how hard-wearing a floor is. For living areas or private use, the service classes are between 21 for light wear (guest room or bedroom) and 23 for heavy wear (hallway, stairwell, children's room). Service classes 31 to 34 are recommended for commercial areas. Industrial floors have service classes 41 to 43.
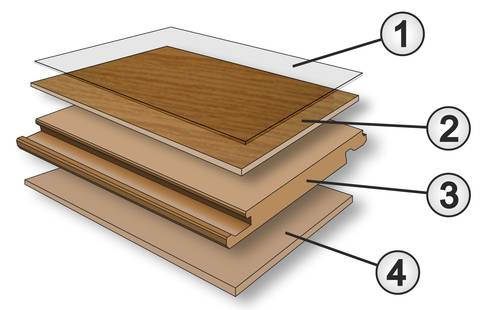
Modern floor coverings, whether laminate, vinyl or parquet, are preferably offered as click panels.
The advantage of these panels is the simple and gap-free installation. The individual panels are equipped with a special locking system that interlocks in a similar way to tongue and groove.
When click panels are joined together during installation, they interlock with each other to create a gap-free surface.
Thanks to this clever technology, anyone with a little manual skill and the necessary expertise can lay a perfect-looking floor.
As with painting or wallpapering, there is also some important preparatory work to be done when laying floor panels.
Determine material requirements
Before selecting the material, measure the room to determine the required material for panels and edge strips.
For a rectangular area, add approx. 10% waste. If the room is angled, the waste can be significantly higher.
Also check the required length of the edge strips and which additional covers (e.g. for radiator pipes) or other coverings are required.
Prepare the room
To be able to work properly, the furniture must be removed and the room completely cleared.
Depending on the floor covering and installation technique (floating or glued down), the subfloor must be prepared. It may be necessary to remove old floor coverings or carpets.
Any unevenness in the subfloor must be leveled and smoothed.
For floating installation, it is sufficient if the floor is swept clean. If glued down, the subfloor must be dust-free.
Important: Check the air gap under the doors that protrude into the room now. This is because if the doors removed for the installation work are too long at the lower end, the door leaves can scratch the new floor once they have been hung.
Our practical tip: Acclimatization
The panels to be installed should be stored for 24 to 48 hours in the room in which they are to be installed. Store the panels on a flat surface in the middle of the room. The temperature should be 17 - 25 °C and the humidity should be in the range of 50 - 60 %.
Define laying direction
A very important point when laying panels is the laying direction. This must be defined in advance.
This is because the direction of the grain can visually compress or stretch a room.
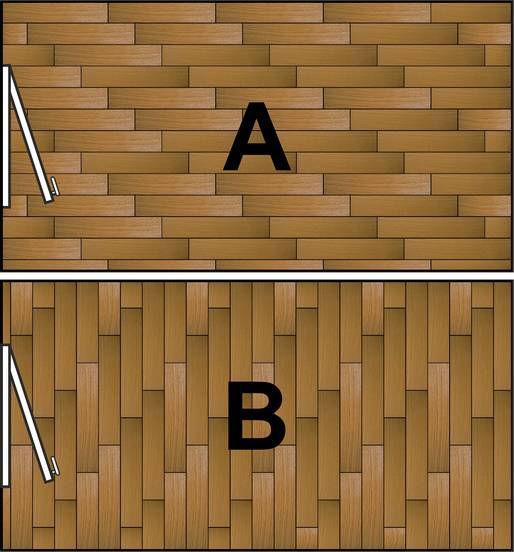
As a rule, the panels are laid lengthways to the main light source (window or balcony door on the left in the sketch). This makes the rooms appear longer and larger (sketch A).
If the panels are laid at right angles to the primary light source, the structure of the floor is emphasized and the depth of the room is visually increased (sketch B).
If necessary, simply draw a true-to-scale sketch, which will immediately show you which installation direction is ideal for the room in question.
The sketch also shows the width of the last row of panels. The panels in the last row must not be too narrow under any circumstances. If this is the case, the width of the first row of panels must be reduced by cutting them to size.
Impact sound insulation and moisture protection
If the floor panels are laid on a mineral substrate (concrete, screed or stone tiles), the swept floor must first be covered with a vapor barrier film (PE film) to protect the floor panels from moisture from below.
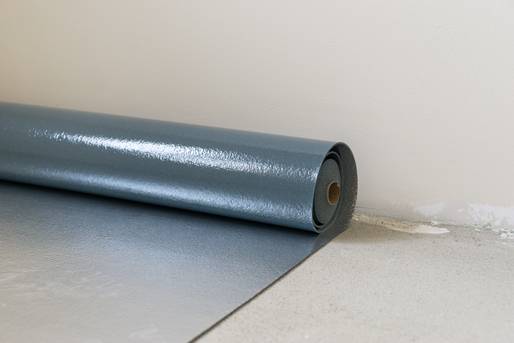
If the panels do not have integrated impact sound insulation, additional impact sound insulation from a roll is laid on top of the foil.
In case of doubt, any unanswered questions regarding the requirements for correct installation of the floor covering can be clarified with the seller.
Measuring the first row
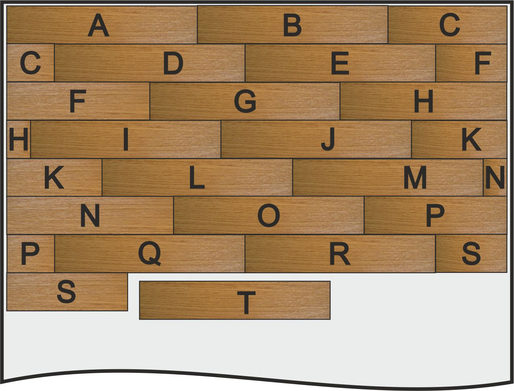
Before you lay the first panel, you need to think about the joint offset. In order to create a stable and tight-fitting surface, the joints on the narrow sides of the panels must be offset from each other. In addition, no panel must be shorter than 30 cm at the side edge.
The width of the row of panels laid at the end must also be taken into account. This must not be narrower than 5 cm. As a result, it may be necessary to cut the first row of panels to size. If it is necessary to cut the width to size, the side with the protruding part (tongue) must be removed.
If you have made an exact drawing of the room with the laying direction, the width of the last row of panels can already be determined from the sketch. Otherwise, the room must be measured.
Important! Make sure that the first row of panels is straight. To do this, cut off the tongue, i.e. the protruding part that normally engages with the neighboring panel, and deburr the cut edge with sandpaper.
If the wall on which the first row is to be installed is crooked, the panels must be cut to the correct width to compensate for the crookedness of the wall. Otherwise, there is a risk that the grain of the floor will be crooked throughout the room. In practice, it has proven useful in this case to draw a guideline on the floor that is straight in relation to the room so that the first row of panels can be precisely aligned.
Cutting the panels to size
To avoid damaging the delicate surface when cutting, panels should be marked on the underside and sawn with the underside facing upwards.
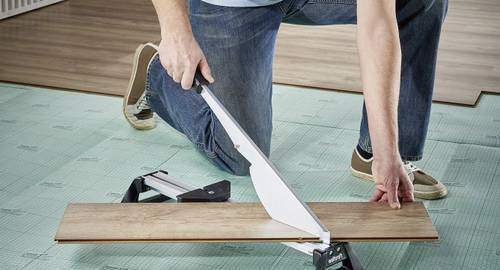
Especially when using circular hand saws or jigsaws. Stop rails should be used for straight longitudinal cuts. A practical alternative to jigsaws are so-called laminate cutters or laminate crackers.
These can be used to cut panels without damaging the surface and there are no sawdust.
Laying the first row of panels
If the floor panels are to be glued, the adhesive must first be applied to the vacuumed floor and spread evenly with a notched trowel. Only use as much adhesive as necessary and apply the adhesive separately for each row of panels. Avoid getting the adhesive on top of the panel surface.
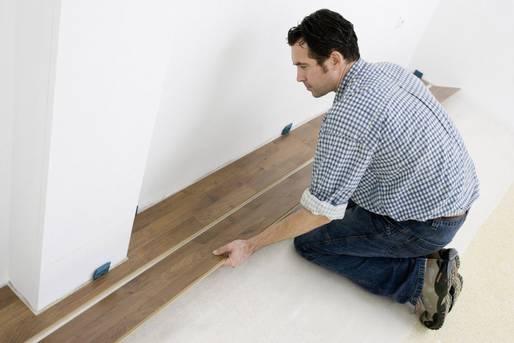
Unless the manufacturer specifies other installation instructions, the first panel is laid on the left with the cut tongue side facing the wall. Keep a distance of approx. 10 - 15 mm from the wall and other fixed elements on both sides. Use spacer wedges for this, which are removed again before the edge strips are placed. Attach the second panel to the right of the first panel. Also use a spacer wedge at the transition to the wall and push the laminate against the wall. The last panel on the right-hand side must be cut and inserted so that a gap of 10 - 15 mm to the right-hand wall is also maintained here.
The remaining section of the right-hand panel of the first row is the first part of the second row, which is placed on the left (see sketch with the joint offset). Again, keep the distance to the left wall. The rest of the installation follows the same pattern as the first row.
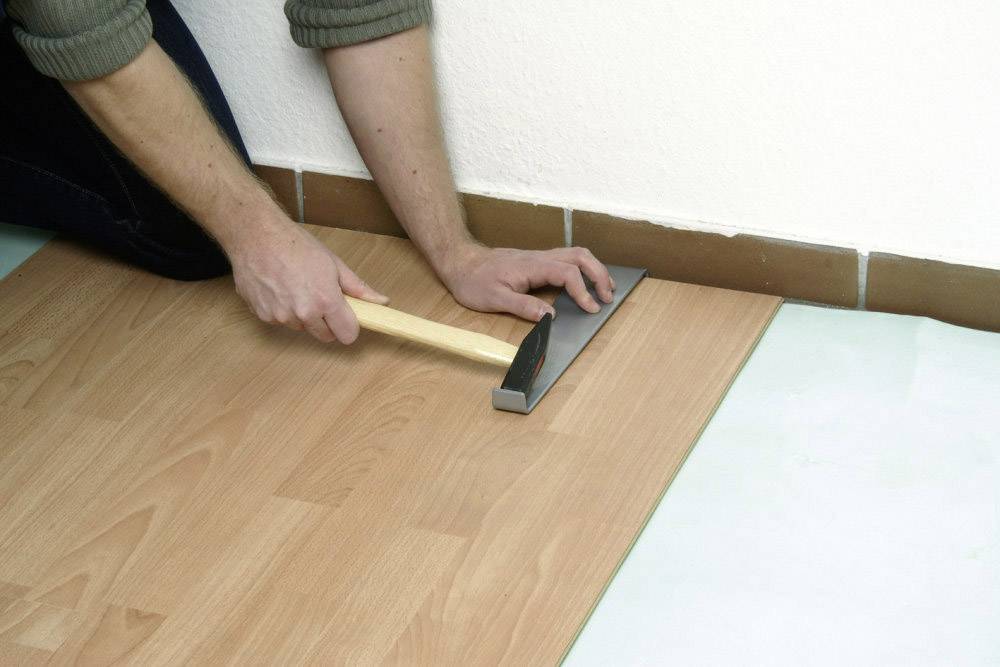
If required, there are angled laminate laying tools or pull irons and material-friendly tapping blocks that can be used to join the individual panels together seamlessly.
Recessing radiator pipes
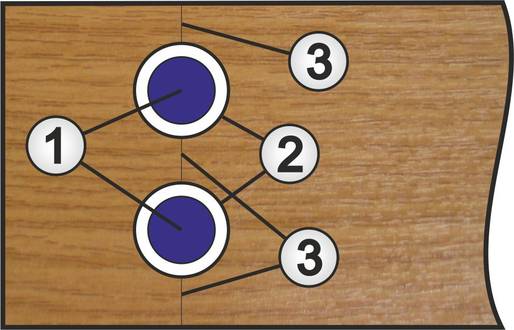
First, the positions of the pipes coming out of the floor (1) are transferred exactly to the panel. This can be done in no time at all using a practical contour gauge.
Then drill circular openings (2) in the panel using a hole drill. The hole diameter depends on the pipe or pipe cover.
The panel is then cut through at the height of the drill holes. The two parts are then attached to the pipes from the right and left, whereby the separation point (3) is coated with wood glue before being pushed together. Wipe off any excess glue immediately with a cloth.
Edge strips and door sills
After installation, the wall spacers are removed and the edge strips are fitted. Here too, there are different systems and installation instructions depending on the manufacturer. In practice, brackets that simply need to be screwed to the wall have proven their worth. The cut-to-size edging strips are then simply snapped into the holders. For the door area, there are edging strips in different materials, colors and widths that ensure a clean transition between the different floor coverings.
If the installation of wooden ceilings or wall panels was planned during the renovation, the installation is basically the same as for floor panels. However, a wooden substructure is required instead of impact sound insulation.
Create substructure
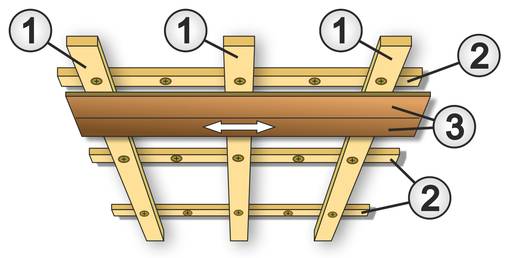
In timber construction, the substructure is also referred to as support battens and consists of wooden battens or roof battens spaced approx. 40 cm apart. The substructure is mounted directly to the wall or ceiling with knock-in dowels and is therefore securely anchored.
However, the subsequent alignment of the panels must first be determined. The incidence of light through windows and doors also plays an important role here. The support battens must then be aligned at a 90° angle to the panels.
If rear ventilation of the cladding is required, wooden counter battens must first be installed between the support battens and the ceiling or wall.
The counter battens then have the same alignment as the panels to be installed later. When installing the substructure, any height differences in the ceiling are compensated for by inserting thin wooden boards.
Installing panels
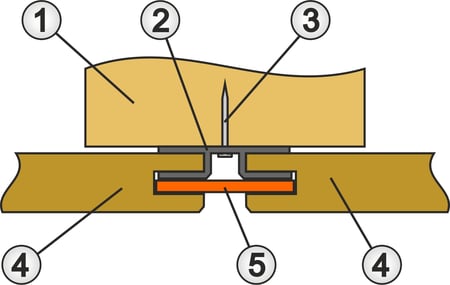
During installation, the panels are fastened with special profile board claws that are nailed or screwed to the support battens.
The exact procedure and the design of the clamps depend on the panels. This is because the panels are available in a tongue and groove version or with an all-round groove and separate tongue and groove strips.
Here too, the specialist staff in the store can recommend the necessary installation accessories.
Installation with the necessary joint offset and the required wall spacing is then identical to the floor panels.
Woodwork is not only used indoors. Wood is also used on the outside from time to time.
For example, the canopy on the façade of the building is often supported by a wooden structure. But the screen wall on the balcony, the tool shed behind the house or the fence in the garden are also usually made of wood.
Even wooden windows or wooden window frames can still be found in many properties.
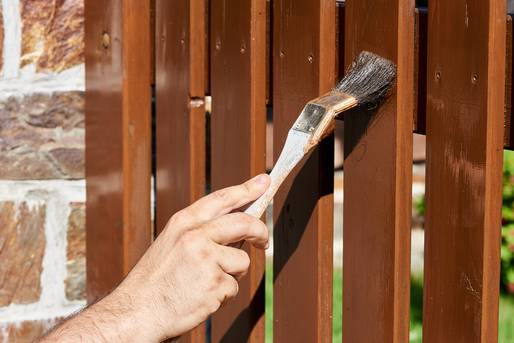
However, in these cases, repair or restoration is the exception rather than the rule. In most cases, a new coat of paint is sufficient for renovation.
Insufficient planning for modernization
Regardless of whether it is a conversion, new build, extension or renovation, the upcoming work should be planned precisely. Because if mistakes creep in when designing with wood, they can usually only be rectified with a considerable amount of work and additional material. It is therefore better to measure, check and recalculate twice in advance.
No adjustment to the room temperature
The panels should be purchased in good time and stored for 24 - 48 hours where they will be installed later. This allows the wood or building material to adapt to the existing temperature.
Incorrect storage
The panels should be stored flat on the floor. If they are leaned against the wall at an angle, the wood will warp and the panels will become crooked.
Expansion joint too small
If the expansion joint to the walls is too small, the wooden floor may not be able to expand properly. It comes under mechanical tension and can lift.
Incorrect approach of the first row
If the first row is positioned incorrectly, it may not be possible to comply with the minimum dimensions of the individual elements. Panel elements may then have to be shorter than 30 cm at the edge or the last panels to be inserted at the end of the installation may have to be narrower than 5 cm.
Do not compensate for height differences in the ceiling with the substructure
In a room with white walls and a white ceiling, height differences in the ceiling are often not noticeable at all. However, if the substructure brings the wooden ceiling much closer to the top edge of an upright cupboard, for example, it is very easy to notice if the substructure has not compensated for a level difference in the ceiling.
